For those who bake, it is a well-known fact that few recipes can be made without butter. Butter plays a vital role in a variety of recipes in the kitchen, specifically pastries and other baked goods. When baking, there are fewer questions that bakers usually ask, as recipes are far less complex and ingredient-heavy. However, one question that all bakers and home cooks ask themselves is: should they use salted or unsalted butter? The difference between salted and unsalted butter is small. However, the difference can make or break a cake or muffin you are trying to serve your friends and family.
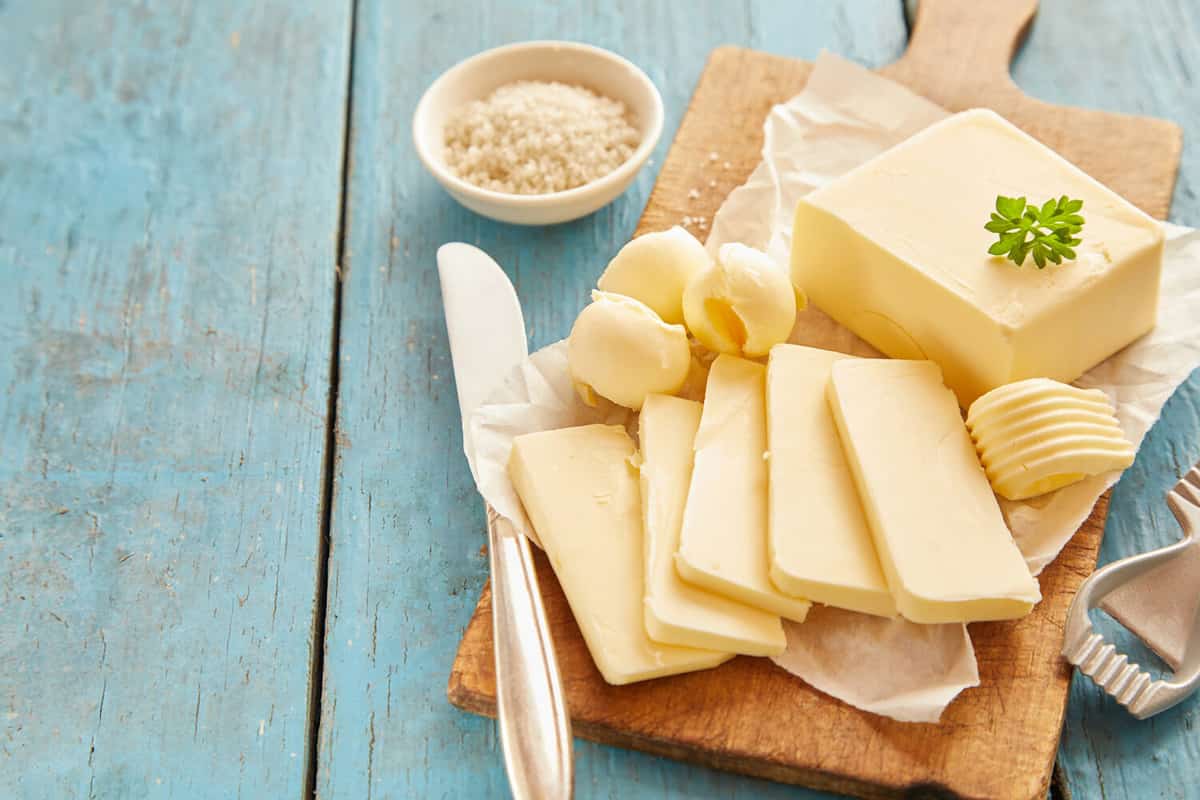
Butter comes in two main types: salted and unsalted.©stockcreations/Shutterstock.com
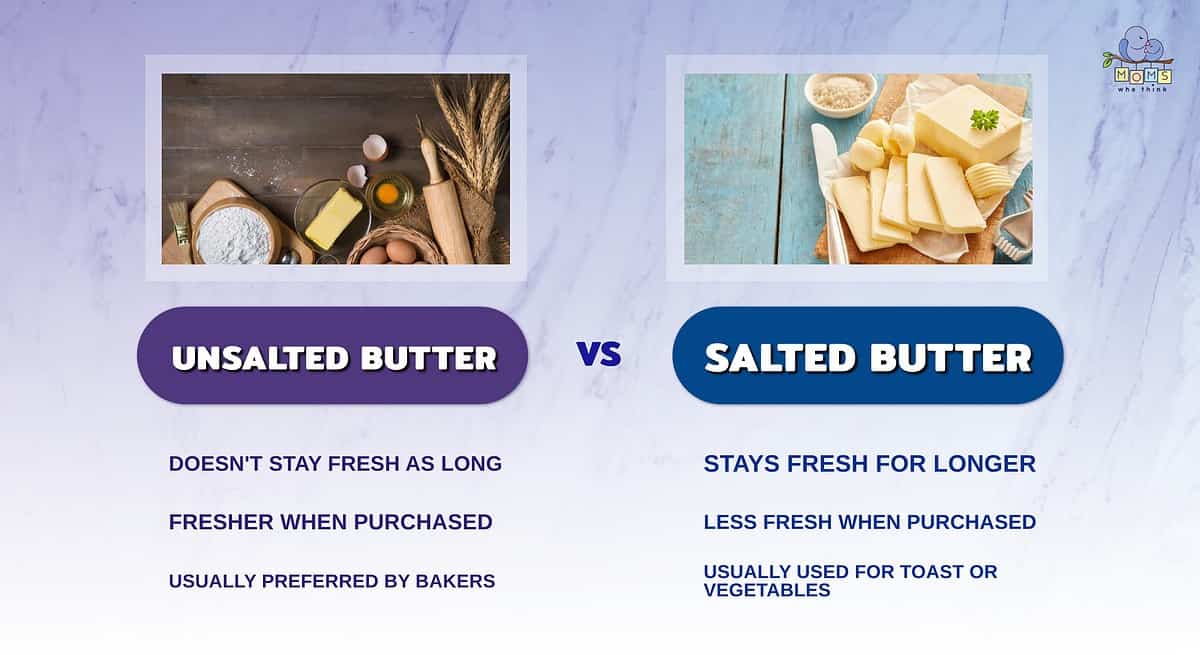
What is Salted Butter Salted butter is the type of butter that you can find easily in any grocery store. The salt is added to the butter after the butter has been created and manufactured. The salt content usually helps to keep the butter fresh for longer, as it works as a way to preserve the butter on the shelf. When it comes to how much salt is added to salted butter, it's usually 1/4 teaspoon per 1/2 cup of butter.
What is Unsalted Butter Unsalted butter is pure butter, unsalted, and has nothing added to it. This can also be found at the grocery store, but it is less common as it lasts for a shorter timeframe on shelves. It is also fresher when purchased because it does not last as long as salted butter.
The salt added to salted butter keeps it shelf-stable for longer.©Svetlana Monyakova/Shutterstock.com
Which To Use When Baking When it comes to baking, many bakers prefer to use unsalted butter. The reason behind this is that unsalted butter is pure with no additives. This gives chefs and bakers full control over their recipes. Using salted butter takes away the control over the salt content. As well, there may be other additives and preservatives in the salted butter used.
In addition, every salted butter brand has a different amount of salt added to it. This can lead to having different flavors in every recipe. This means your recipe will come out different every time. This can be a problem for those who are looking to bake in large quantities.
Some bakers opt to use unsalted butter, as well, do to sodium content. Individuals sometimes do not want to have high sodium amounts in their recipes. For those who are looking to bake recipes that are healthier and full of less salt, unsalted butter is the way to go.
©Pinkyone/Shutterstock.com
When To Use Salted Butter While not many bakers prefer to use salted butter in their recipes, there are some instances where salted butter is used in the kitchen. These recipes are geared more towards vegetables, or even toast and other breakfast items. Many people enjoy having the saltiness added to their veggies or even on their morning toast.
Salted butter is an easy addition to a recipe as it requires you to forgo adding additional salt, but it does take away from the control over the sodium content of your recipe overall. For bakers, unsalted butter allows for a sweeter flavor in their baked goods.
The Bottom Line Both types of butter have their ideal uses. The salt content in salted butter allows it to stay fresher for longer. This means that it will last for longer on store shelves, making it easier to sell. Since unsalted butter doesn't last as long, it's usually fresher on store shelves. Salted butter may have just been put out on the shelves, or it may have been there for some time. Unsalted butter is preferred by bakers since its purity doesn't affect the taste of recipes at all. Salted butter is often used on toast and vegetables, since many people like the idea of a little saltiness with these foods. When it comes to baked goods and recipes, not many recipes differ between salted and unsalted butter. If you are cooking off of a box or cookie packet, they usually do not differentiate. However, when baking a home from scratch, many prefer to use unsalted butter.
Print clock clock icon
cutlery cutlery icon
flag flag icon
folder folder icon
instagram instagram icon
pinterest pinterest icon
facebook facebook icon
print print icon
squares squares icon
heart heart icon
heart solid heart solid icon
3 cups buttermilk2 teaspoons vanilla extract4 cups all-purpose flour1/2 cup white sugar1 Tablespoon plus 1 teaspoon baking powder2 teaspoons baking soda1 1/2 teaspoons salt4 eggs1/2 cup butter, melted Cook Mode Prevent your screen from going dark
Add vanilla extract to the buttermilk in a medium bowl and set aside. Combine flour, sugar, baking powder, baking soda, and salt in a large mixing bowl. Whisk egg and butter into the vanilla buttermilk. Pour the flour mixture into the wet ingredients and whisk until lumps are gone. Mix just enough to incorporate all the ingredients. Do not over-mix, it will make the pancakes tougher and much less fluffy. Let this mixture rest for 15 minutes (see the Tip below for why). Do NOT stir as it rests, or after it is done resting. The batter will be thick. Trust us on this, by following this rule we’ve had consistently fluffy, delicious pancakes every time!Heat a large skillet over medium heat, and coat well with cooking spray. Pour 1/4 cupfuls of batter onto the skillet, and cook until bubbles appear on the surface. Flip with a spatula, and cook until browned on the other side. You can add blueberries or chocolate chips to the batter, add to the dry ingredients before combining with the buttermilk mixture.
Serve topped with any of these for added deliciousness:
Maple Syrup Sliced Bananas drizzled with caramel sundae topping and whipped cream Sliced strawberries and whipped cream Chocolate syrup Sprinkled with cinnamon and confectioners sugar Tip from BakingMad.com , our favorite UK baking site:
* Before frying your pancake batter, give it a rest. When it’s mixed it activates the gluten and resting the batter allows it to relax, improving the texture. It also allows the starch molecules in the flour to absorb the liquid in the batter, giving it a thicker, more bouncy consistency.
window.trCommon={"minRating":6,"ajaxurl":"https:\/\/www.momswhothink.com\/wp-admin\/admin-ajax.php","ratingNonce":"","postId":149950};
window.TastyRecipes = window.TastyRecipes || {}; window.TastyRecipes.smoothScroll = {
init() {
document.addEventListener( 'click', ( e ) => {
let anchor = e.target;
if ( anchor.tagName !== 'A' ) {
anchor = anchor.closest( 'a.tasty-recipes-scrollto' );
} if ( ! anchor || ! anchor.classList.contains( 'tasty-recipes-scrollto' ) ) {
return;
} const elementHref = anchor.getAttribute( 'href' );
if ( ! elementHref ) {
return;
} e.preventDefault();
this.goToSelector( elementHref );
});
},
goToSelector( selector ) {
const element = document.querySelector( selector );
if ( ! element ) {
return;
}
element.scrollIntoView( { behavior: 'smooth' } );
}
}; document.addEventListener(
'DOMContentLoaded',
() => window.TastyRecipes.smoothScroll.init()
); (function(){ var bothEquals = function( d1, d2, D ) {
var ret = 0;
if (d1<=D) {
ret++;
}
if (d2<=D) {
ret++;
}
return ret === 2;
}; var frac =function frac(x,D,mixed){var n1=Math.floor(x),d1=1;var n2=n1+1,d2=1;if(x!==n1){while(bothEquals(d1,d2,D)){var m=(n1+n2)/(d1+d2);if(x===m){if(d1+d2d2){d2=D+1;}else {d1=D+1;}break}else if(xD){d1=d2;n1=n2}if(!mixed){return[0,n1,d1];}var q=Math.floor(n1/d1);return[q,n1-q*d1,d1]};frac.cont=function cont(x,D,mixed){var sgn=x<0?-1:1;var B=x*sgn;var P_2=0,P_1=1,P=0;var Q_2=1,Q_1=0,Q=0;var A=Math.floor(B);while(Q_1<D){A=Math.floor(B);P=A*P_1+P_2;Q=A*Q_1+Q_2;if(B-AD){if(Q_1>D){Q=Q_2;P=P_2}else{Q=Q_1;P=P_1}}if(!mixed){return[0,sgn*P,Q];}var q=Math.floor(sgn*P/Q);return[q,sgn*P-q*Q,Q]}; window.tastyRecipesVulgarFractions = JSON.parse(decodeURIComponent("%7B%22%C2%BC%22%3A%221%2F4%22%2C%22%C2%BD%22%3A%221%2F2%22%2C%22%C2%BE%22%3A%223%2F4%22%2C%22%E2%85%93%22%3A%221%2F3%22%2C%22%E2%85%94%22%3A%222%2F3%22%2C%22%E2%85%95%22%3A%221%2F5%22%2C%22%E2%85%96%22%3A%222%2F5%22%2C%22%E2%85%97%22%3A%223%2F5%22%2C%22%E2%85%98%22%3A%224%2F5%22%2C%22%E2%85%99%22%3A%221%2F6%22%2C%22%E2%85%9A%22%3A%225%2F6%22%2C%22%E2%85%9B%22%3A%221%2F8%22%2C%22%E2%85%9C%22%3A%223%2F8%22%2C%22%E2%85%9D%22%3A%225%2F8%22%2C%22%E2%85%9E%22%3A%227%2F8%22%7D")); window.tastyRecipesFormatAmount = function(amount, el) {
if ( parseFloat( amount ) === parseInt( amount ) ) {
return amount;
}
var roundType = 'frac';
if (typeof el.dataset.amountShouldRound !== 'undefined') {
if ('false' !== el.dataset.amountShouldRound) {
if ( 'number' === el.dataset.amountShouldRound ) {
roundType = 'number';
} else if ('frac' === el.dataset.amountShouldRound) {
roundType = 'frac';
} else if ('vulgar' === el.dataset.amountShouldRound) {
roundType = 'vulgar';
} else {
roundType = 'integer';
}
}
}
if ('number' === roundType) {
amount = Number.parseFloat(amount).toPrecision(2);
} else if ('integer' === roundType) {
amount = Math.round(amount);
} else if ('frac' === roundType || 'vulgar' === roundType) {
var denom = 8;
if (typeof el.dataset.unit !== 'undefined') {
var unit = el.dataset.unit;
if (['cups','cup','c'].includes(unit)) {
denom = 4;
if (0.125 === amount) {
denom = 8;
}
if ("0.1667" === Number.parseFloat( amount ).toPrecision(4)) {
denom = 6;
}
}
if (['tablespoons','tablespoon','tbsp'].includes(unit)) {
denom = 2;
}
if (['teaspoons','teaspoon','tsp'].includes(unit)) {
denom = 8;
}
}
var amountArray = frac.cont( amount, denom, true );
var newAmount = '';
if ( amountArray[1] !== 0 ) {
newAmount = amountArray[1] + '/' + amountArray[2];
if ('vulgar' === roundType) {
Object.keys(window.tastyRecipesVulgarFractions).forEach(function(vulgar) {
if (newAmount === window.tastyRecipesVulgarFractions[vulgar]) {
newAmount = vulgar;
}
});
}
}
if ( newAmount ) {
newAmount = ' ' + newAmount;
}
if ( amountArray[0] ) {
newAmount = amountArray[0] + newAmount;
}
amount = newAmount;
}
return amount;
}; window.tastyRecipesUpdatePrintLink = () => { const printButton = document.querySelector( '.tasty-recipes-print-button' ); if ( ! printButton ) {
return;
} const printURL = new URL( printButton.href );
const searchParams = new URLSearchParams( printURL.search ); const unitButton = document.querySelector( '.tasty-recipes-convert-button-active' );
const scaleButton = document.querySelector( '.tasty-recipes-scale-button-active' ); let unit = '';
let scale = ''; if ( unitButton ) {
unit = unitButton.dataset.unitType;
searchParams.delete('unit');
searchParams.set( 'unit', unit );
} if ( scaleButton ) {
scale = scaleButton.dataset.amount;
searchParams.set( 'scale', scale );
} const paramString = searchParams.toString();
const newURL = '' === paramString ? printURL.href : printURL.origin + printURL.pathname + '?' + paramString;
const printLinks = document.querySelectorAll( '.tasty-recipes-print-link' ); printLinks.forEach( ( el ) => {
el.href = newURL;
}); const printButtons = document.querySelectorAll( '.tasty-recipes-print-button' );
printButtons.forEach( ( el ) => {
el.href = newURL;
});
}; document.addEventListener( 'DOMContentLoaded', () => { if ( ! window.location.href.includes( '/print/' ) ) {
return;
} const searchParams = new URLSearchParams( window.location.search ); const unit = searchParams.get( 'unit' );
const scale = searchParams.get( 'scale' ); if ( unit && ( 'metric' === unit || 'usc' === unit ) ) {
document.querySelector( '.tasty-recipes-convert-button[data-unit-type="' + unit + '"]' ).click();
} if ( scale && Number(scale) > 0 ) {
document.querySelector( '.tasty-recipes-scale-button[data-amount="' + Number(scale) + '"]' ).click();
}
});
}()); (function(){
var buttonClass = 'tasty-recipes-convert-button',
buttonActiveClass = 'tasty-recipes-convert-button-active',
buttons = document.querySelectorAll('.tasty-recipes-convert-button');
if ( ! buttons ) {
return;
}
buttons.forEach(function(button){
button.addEventListener('click', function(event){
event.preventDefault();
var recipe = event.target.closest('.tasty-recipes');
if ( ! recipe ) {
return;
}
var otherButtons = recipe.querySelectorAll('.' + buttonClass);
otherButtons.forEach(function(bt){
bt.classList.remove(buttonActiveClass);
});
button.classList.add(buttonActiveClass);
var unitType = button.dataset.unitType;
var dataset = 'nf' + unitType.charAt(0).toUpperCase() + unitType.slice(1);
var convertables = recipe.querySelectorAll('span[data-nf-original]');
convertables.forEach(function(convertable){
if (typeof convertable.dataset.amountOriginalType === 'undefined'
&& 'usc' === convertable.dataset.nfOriginal) {
if (-1 !== convertable.innerText.indexOf('/')) {
convertable.dataset.amountOriginalType = 'frac';
}
if (-1 !== convertable.innerText.indexOf('.')) {
convertable.dataset.amountOriginalType = 'number';
}
Object.keys(window.tastyRecipesVulgarFractions).forEach(function(vulgar) {
if (-1 !== convertable.innerText.indexOf(vulgar)) {
convertable.dataset.amountOriginalType = 'vulgar';
}
});
}
convertable.innerText = convertable.dataset[dataset];
if (typeof convertable.dataset.unit !== 'undefined') {
convertable.dataset.unit = convertable.dataset[dataset + 'Unit'];
}
if (typeof convertable.dataset.amount !== 'undefined') {
convertable.dataset.amount = convertable.dataset[dataset];
if ('metric' === unitType) {
convertable.dataset.amountShouldRound = parseInt(convertable.dataset.amount) >= 10 ? 'integer' : 'number';
} else if (typeof convertable.dataset.amountOriginalType !== 'undefined') {
convertable.dataset.amountShouldRound = convertable.dataset.amountOriginalType;
} else {
convertable.dataset.amountShouldRound = false;
}
convertable.innerText = window.tastyRecipesFormatAmount(convertable.dataset[dataset], convertable);
}
if (convertable.classList.contains('nutrifox-unit')) {
if ('gram' === convertable.dataset[dataset]) {
convertable.innerText = 'grams';
}
}
}); document.querySelectorAll('.tasty-recipes-scale-button-active').forEach(function(scaleButton){
scaleButton.click();
}); window.tastyRecipesUpdatePrintLink();
});
});
}()); (function(){
var buttonClass = 'tasty-recipes-scale-button',
buttonActiveClass = 'tasty-recipes-scale-button-active',
buttons = document.querySelectorAll('.tasty-recipes-scale-button');
if ( ! buttons ) {
return;
} buttons.forEach(function(button){
button.addEventListener('click', function(event){
event.preventDefault();
var recipe = event.target.closest('.tasty-recipes');
if ( ! recipe ) {
return;
}
var otherButtons = recipe.querySelectorAll('.' + buttonClass);
otherButtons.forEach(function(bt){
bt.classList.remove(buttonActiveClass);
});
button.classList.add(buttonActiveClass); var scalables = recipe.querySelectorAll('span[data-amount]');
var buttonAmount = parseFloat( button.dataset.amount );
scalables.forEach(function(scalable){
if (typeof scalable.dataset.amountOriginalType === 'undefined'
&& typeof scalable.dataset.nfOriginal === 'undefined') {
if (-1 !== scalable.innerText.indexOf('/')) {
scalable.dataset.amountOriginalType = 'frac';
}
if (-1 !== scalable.innerText.indexOf('.')) {
scalable.dataset.amountOriginalType = 'number';
}
Object.keys(window.tastyRecipesVulgarFractions).forEach(function(vulgar) {
if (-1 !== scalable.innerText.indexOf(vulgar)) {
scalable.dataset.amountOriginalType = 'vulgar';
}
});
if (typeof scalable.dataset.amountOriginalType !== 'undefined') {
scalable.dataset.amountShouldRound = scalable.dataset.amountOriginalType;
}
}
var amount = parseFloat( scalable.dataset.amount ) * buttonAmount;
amount = window.tastyRecipesFormatAmount(amount, scalable);
if ( typeof scalable.dataset.unit !== 'undefined' ) {
if ( ! scalable.classList.contains('nutrifox-quantity') ) {
if ( ! scalable.classList.contains('nutrifox-second-quantity') ) {
amount += ' ' + scalable.dataset.unit;
}
}
}
scalable.innerText = amount;
}); var nonNumerics = recipe.querySelectorAll('[data-has-non-numeric-amount]');
nonNumerics.forEach(function(nonNumeric){
var indicator = nonNumeric.querySelector('span[data-non-numeric-label]');
if ( indicator ) {
nonNumeric.removeChild(indicator);
}
if ( 1 !== buttonAmount ) {
indicator = document.createElement('span');
indicator.setAttribute('data-non-numeric-label', true);
var text = document.createTextNode(' (x' + buttonAmount + ')');
indicator.appendChild(text);
nonNumeric.appendChild(indicator);
}
}); window.tastyRecipesUpdatePrintLink();
});
});
}()); window.TastyRecipes = window.TastyRecipes || {};
window.TastyRecipes.cookMode = {
wakeLockApi: false,
wakeLock: false,
cookModeSelector: '.tasty-recipes-cook-mode',
init() {
if ("wakeLock" in navigator && "request" in navigator.wakeLock) {
this.wakeLockApi = navigator.wakeLock;
} const cookModes = document.querySelectorAll(this.cookModeSelector); if (cookModes.length > 0) {
for (const cookMode of cookModes) {
if (this.wakeLockApi) {
cookMode.querySelector('input[type="checkbox"]').addEventListener("change", event => {
this.checkboxChange(event.target);
}, false);
} else {
cookMode.style.display = "none";
}
}
}
},
checkboxChange(checkbox) {
if (checkbox.checked) {
this.lock();
} else {
this.unlock();
}
},
setCheckboxesState(state) {
const checkboxes = document.querySelectorAll(this.cookModeSelector + ' input[type="checkbox"]');
for (const checkbox of checkboxes) {
checkbox.checked = state;
}
},
async lock() {
try {
this.wakeLock = await this.wakeLockApi.request("screen");
this.wakeLock.addEventListener("release", () => {
this.wakeLock = false;
this.setCheckboxesState(false);
});
this.setCheckboxesState(true);
} catch (error) {
this.setCheckboxesState(false);
}
},
unlock() {
if (this.wakeLock) {
this.wakeLock.release();
this.wakeLock = false;
}
this.setCheckboxesState(false);
}
}; (function(callback) {
if (document.readyState !== "loading") {
callback();
} else {
document.addEventListener("DOMContentLoaded", callback);
}
})(() => {
window.TastyRecipes.cookMode.init();
}); window.TastyRecipes = window.TastyRecipes || {}; window.TastyRecipes.staticTooltip = {
element: null,
tooltipElement: null,
deleting: false,
init( element ) {
if ( this.deleting ) {
return;
}
this.element = element;
this.buildElements();
},
destroy() {
if ( ! this.tooltipElement || this.deleting ) {
return;
} this.deleting = true;
this.tooltipElement.classList.remove( 'opened' ); setTimeout( () => {
this.tooltipElement.remove();
this.deleting = false;
}, 500 );
},
buildElements() {
const tooltipElement = document.createElement( 'div' );
tooltipElement.classList.add( 'tasty-recipes-static-tooltip');
tooltipElement.setAttribute( 'id', 'tasty-recipes-tooltip' ); const currentTooltipElement = document.getElementById( 'tasty-recipes-tooltip' );
if ( currentTooltipElement ) {
document.body.replaceChild( tooltipElement, currentTooltipElement );
} else {
document.body.appendChild( tooltipElement );
} this.tooltipElement = document.getElementById( 'tasty-recipes-tooltip' );
},
show() {
if ( ! this.tooltipElement ) {
return;
} const tooltipTop = this.element.getBoundingClientRect().top
+ window.scrollY
- 10 // 10px offset.
- this.tooltipElement.getBoundingClientRect().height;
const tooltipLeft = this.element.getBoundingClientRect().left
- ( this.tooltipElement.getBoundingClientRect().width / 2 )
+ ( this.element.getBoundingClientRect().width / 2 ) - 1;
const posLeft = Math.max( 10, tooltipLeft );
this.maybeRemoveTail( posLeft !== tooltipLeft ); this.tooltipElement.setAttribute( 'style', 'top:' + tooltipTop + 'px;left:' + posLeft + 'px;' );
this.tooltipElement.classList.add( 'opened' ); },
maybeRemoveTail( removeTail ) {
if ( removeTail ) {
this.tooltipElement.classList.add( 'tr-hide-tail' );
} else {
this.tooltipElement.classList.remove( 'tr-hide-tail' );
}
},
changeMessage( message ) {
if ( ! this.tooltipElement ) {
return;
}
this.tooltipElement.innerHTML = message;
}
}; window.TastyRecipes.ajax = {
sendPostRequest( url, data, success, failure ) {
const xhr = new XMLHttpRequest();
xhr.open( 'POST', url, true );
xhr.send( this.preparePostData( data ) ); xhr.onreadystatechange = () => {
if ( 4 !== xhr.readyState ) {
return;
}
if ( xhr.status === 200 ) {
success( JSON.parse( xhr.responseText ) );
return;
} failure( xhr );
}; xhr.onerror = () => {
failure( xhr );
};
},
preparePostData( data ) {
const formData = new FormData(); for ( const key in data ) {
formData.append( key, data[key] );
}
return formData;
},
}; window.TastyRecipes.ratings = {
defaultRating: 0,
currentRatingPercentage: 100,
savingRating: false,
init( minRating ) {
this.minRating = minRating; this.formWatchRating();
this.closeTooltipWhenClickOutside();
this.addBodyClassBasedOnSelectedRating();
this.backwardCompFormRatingPosition();
},
formWatchRating() {
const ratings = document.querySelectorAll('.tasty-recipes-no-ratings-buttons [data-rating]');
if ( ratings.length {
event.preventDefault();
this.defaultRating = event.target.closest( '.checked' ).dataset.rating;
this.setCheckedStar( event.target );
this.maybeSendRating( this.defaultRating, event.target );
this.setRatingInForm( this.defaultRating );
} );
}
},
closeTooltipWhenClickOutside() {
window.addEventListener( 'click', e => {
// Bailout (don't remove the tooltip) when the clicked element is a rating star, or it's the tooltip itself.
if ( e.target.closest( '.tasty-recipes-rating' ) || e.target.classList.contains( 'tasty-recipes-static-tooltip' ) ) {
return;
} window.TastyRecipes.staticTooltip.destroy();
} );
},
setRatingInForm( rating ) {
const ratingInput = document.querySelector( '#respond .tasty-recipes-rating[value="' + rating + '"]' );
if ( ! ratingInput ) {
return;
}
ratingInput.click();
},
addBodyClassBasedOnSelectedRating() {
const ratingInputs = document.querySelectorAll( 'input.tasty-recipes-rating' );
if ( ! ratingInputs ) {
return;
}
for ( const ratingInput of ratingInputs ) {
ratingInput.addEventListener( 'click', currentEvent => {
const selectedRating = currentEvent.target.getAttribute( 'value' );
this.handleBodyClassByRating( selectedRating );
this.toggleCommentTextareaRequired( selectedRating );
} );
}
},
handleBodyClassByRating( rating ) {
if ( rating < this.minRating ) {
document.body.classList.remove( 'tasty-recipes-selected-minimum-rating' );
return;
}
document.body.classList.add( 'tasty-recipes-selected-minimum-rating' );
},
toggleCommentTextareaRequired( rating ) {
const commentTextarea = document.getElementById( 'comment' );
if ( ! commentTextarea ) {
return;
} if ( rating {
window.TastyRecipes.staticTooltip.changeMessage( response.data.message );
window.TastyRecipes.staticTooltip.show();
this.updateAverageText( response.data, recipeCardElement );
this.maybeFillCommentForm( response.data ); // Hide the tooltip after 5 seconds.
setTimeout( () => {
this.maybeResetTooltip( recipeCardElement, response.data, rating );
}, 5000 );
},
() => {
this.resetTooltip( recipeCardElement );
}
);
},
updateAverageText( data, recipeCardElement ) {
if ( ! data.average ) {
return;
}
this.setRatingPercent( data ); if ( ! data.count ) {
return;
} const quickLink = document.querySelector( '.tasty-recipes-rating-link' );
if ( quickLink ) {
this.setTextInContainer( quickLink, data );
this.setPartialStar( quickLink );
} const cardStars = recipeCardElement.querySelector( '.tasty-recipes-ratings-buttons' );
cardStars.dataset.trDefaultRating = data.average;
this.setTextInContainer( recipeCardElement.querySelector( '.tasty-recipes-rating' ), data );
},
setTextInContainer( container, data ) {
if ( ! container ) {
return;
} if ( data.label ) {
const ratingLabelElement = container.querySelector( '.rating-label' );
if ( ratingLabelElement ) {
ratingLabelElement.innerHTML = data.label;
}
return;
} const averageElement = container.querySelector( '.average' );
if ( averageElement ) {
averageElement.textContent = data.average;
} const countElement = container.querySelector( '.count' );
if ( countElement ) {
countElement.textContent = data.count;
}
},
setPartialStar( container ) {
const highestStar = container.querySelector( '[data-rating="' + Math.ceil( this.defaultRating ) + '"]' );
if ( highestStar ) {
highestStar.dataset.trClip = this.currentRatingPercentage;
}
},
setRatingPercent( data ) {
this.defaultRating = data.average.toFixed( 1 );
const parts = data.average.toFixed( 2 ).toString().split( '.' );
this.currentRatingPercentage = parts[1] ? parts[1] : 100;
if ( this.currentRatingPercentage === '00' ) {
this.currentRatingPercentage = 100;
}
},
setCheckedStar( target ) {
const cardRatingContainer = target.closest( '.tasty-recipes-ratings-buttons' );
const selectedRatingElement = cardRatingContainer.querySelector( '[data-tr-checked]' );
if ( selectedRatingElement ) {
delete selectedRatingElement.dataset.trChecked;
} const thisStar = target.closest( '.tasty-recipes-rating' );
thisStar.dataset.trChecked = 1;
thisStar.querySelector( '[data-tr-clip]' ).dataset.trClip = 100;
},
maybeFillCommentForm( data ) {
if ( ! data.comment || ! data.comment.content ) {
return;
} const commentForm = document.querySelector( '#commentform' );
if ( ! commentForm ) {
return;
} const commentBox = commentForm.querySelector( '[name=comment]' );
if ( ! commentBox || commentBox.value ) {
return;
} // Add comment details for editing.
commentBox.innerHTML = data.comment.content;
if ( data.comment.name ) {
commentForm.querySelector( '[name=author]' ).value = data.comment.name;
commentForm.querySelector( '[name=email]' ).value = data.comment.email;
}
},
maybeResetTooltip( recipeCardElement, data, rating ) {
if ( this.savingRating === rating ) {
this.resetTooltip( recipeCardElement, data );
}
},
resetTooltip( recipeCardElement, data ) {
window.TastyRecipes.staticTooltip.destroy();
this.savingRating = false; // Reset the default rating.
const cardRatingContainer = recipeCardElement.querySelector( '.tasty-recipes-ratings-buttons' );
if ( cardRatingContainer ) {
this.defaultRating = ( data && data.average ) ? data.average.toFixed(1) : cardRatingContainer.dataset.trDefaultRating;
cardRatingContainer.dataset.trDefaultRating = this.defaultRating; this.resetSelectedStar( cardRatingContainer, data );
}
},
resetSelectedStar( cardRatingContainer ) {
const selectedRatingElement = cardRatingContainer.querySelector( '[data-rating="' + Math.ceil( this.defaultRating ) + '"]' );
if ( selectedRatingElement ) {
selectedRatingElement.querySelector( '[data-tr-clip]' ).dataset.trClip = this.currentRatingPercentage;
selectedRatingElement.parentNode.dataset.trChecked = 1;
} const previousSelectedElement= cardRatingContainer.querySelector( '[data-tr-checked]' );
if ( previousSelectedElement ) {
const currentSelectedRating = previousSelectedElement.querySelector('[data-rating]');
if ( currentSelectedRating !== selectedRatingElement ) {
delete previousSelectedElement.dataset.trChecked;
}
}
},
backwardCompFormRatingPosition() {
const ratingsButtons = document.querySelector( '#respond .tasty-recipes-ratings-buttons, #tasty-recipes-comment-rating .tasty-recipes-ratings-buttons' );
if ( ! ratingsButtons ) {
return;
}
const ratingsButtonsStyles = window.getComputedStyle(ratingsButtons);
if ( ! ratingsButtonsStyles.display.includes( 'flex' ) ) {
ratingsButtons.style.direction = 'rtl';
} if ( typeof tastyRecipesRating !== 'undefined' ) {
// Select the rating that was previously selected in admin.
ratingsButtons.querySelector( '.tasty-recipes-rating[value="' + tastyRecipesRating + '"]' ).checked = true;
} const ratingSpans = ratingsButtons.querySelectorAll( '.tasty-recipes-rating' );
for (const ratingSpan of ratingSpans) {
ratingSpan.addEventListener( 'click', event => {
if ( ratingSpan === event.target ) {
return;
}
ratingSpan.previousElementSibling.click();
} );
}
}
}; (function(callback) {
if (document.readyState !== "loading") {
callback();
} else {
window.addEventListener( 'load', callback );
}
})(() => {
window.TastyRecipes.ratings.init( window.trCommon ? window.trCommon.minRating : 4 );
});




 (No Ratings Yet)
![]() Loading...
Loading...