Hi, I’m Sandy (Sandra if I’m in trouble). I am so excited to be one of the new contributors to Mother’s Niche! I blog over at Everyday Southwest, a recipe blog full of everyday recipes for everyday families… with a Southwest twist, of course. Mother’s Niche gives me a chance to stretch my wings and have a little fun with food in other ways as well as make lot's of new friends. I can't wait to get to know you!
If there is one thing that a Southwest girl knows about, it’s summer heat and how to beat it. The ice cream man is a hero around these parts and listening for his familiar tune as he winds his way through the neighborhood to our street is the highlight of a hot summer day. Just make sure you step out of the way when you see the kids running after him.
I have to admit that snacks from the ice cream man may not be the healthiest. So, I keep my freezer filled with healthier versions of real fruit popsicles. We call them Paletas or Latin “ice pops.” They are made with lots of real, fresh fruit and less sugar than the ice cream truck variety. You can make some really interesting flavors of paletas like pineapple or even honey dew melon and cantaloupe (a great way to sneak some variety into your kid's diets… shhhhhh… it's our secret).
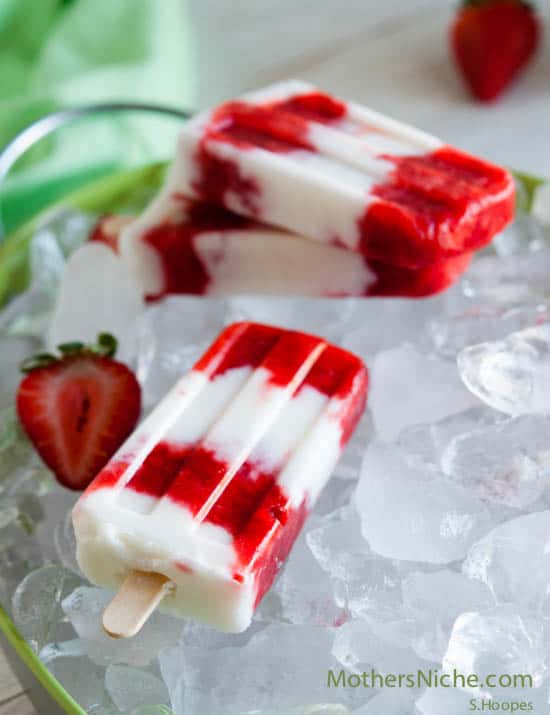
For my first post on Mother's Niche, I thought I would share one of my family's summertime favorites, Strawberry Limeade with Coconut Popsicles. It does have yogurt in the recipe but, I didn't put ” yogurt” in the title because I didn't want to hear my kids say, “eeeeewwww!”
The first step to making a paleta or fresh fruit popsicle is to choose the ripest fruit you can find so that it is sweetened with natural sugar. Peel it, dice it and throw it into the food processor. Pulse until the fruit is diced as finely as you like (I like mine to have a little texture). Add two or three tablespoons of lemon or lime juice then, taste it. Does it really need sugar? If your fruit is on the tart side, it will. But, the fruit won't always need it. Stir in sugar a little at a time until it tastes right to you. The mixture should be on the “sweet side” because you won't taste the sugar as much after it is frozen.
Next, pour the fruit into the popsicle molds. That's it. Really! It took me 10 minutes to prepare the popsicle mixtures and 5 to pour them into the molds. The rest of the time, the popsicles are just sitting in the freezer waiting for you and your family to eat them.
This recipe made 10 popsicles with this popsicle mold. Please feel free to use any mold you have at home or even use small paper drinking cups for your molds. Just peel away the paper when they are frozen. Don't forget the popsicle sticks! Here is a link to other popsicle molds found on Amazon.
I hope your family loves these as much as mine does!
See you soon,
Sandy
- 1 pound fresh strawberries
- 1 large, juicy lime, juiced (about 2-3 tablespoons)
- 1/2 cup granulated sugar
- 1 cup plain yogurt
- 1 cup coconut milk (regular, not light, was used)
- 2/3 cups granulated sugar
- 1/4 teaspoon vanilla (optional)
- Wash popsicle molds and place in the freezer along with the sticks to chill.
- Wash strawberries and remove stems, place in the bowl of a food processor. Slice the large ones in half so that the berries are similar in size. Pulse the food processor until the berries finely diced but, there is still texture to the mix.
- Juice the lime and add to the chopped berries.
- Sprinkle the sugar over the strawberries and stir to combine. Set aside while preparing the rest of the popsicles so that the berries will create their own juice.
- In a mixing bowl, combine the yogurt, coconut milk and sugar. Add vanilla, if desired. Remember that the more vanilla added, the less white the mixture will be.
- Remove the popsicle molds from the freezer. Layer two spoonfuls of strawberry mixture into the bottom of the molds. Carefully pour an inch or so of the coconut mixture over the berries. Repeat the layers until the molds are filled.
- Add the popsicle sticks and the tops of the molds and place in the freezer. Freeze for 6 to 8 hours or overnight.


