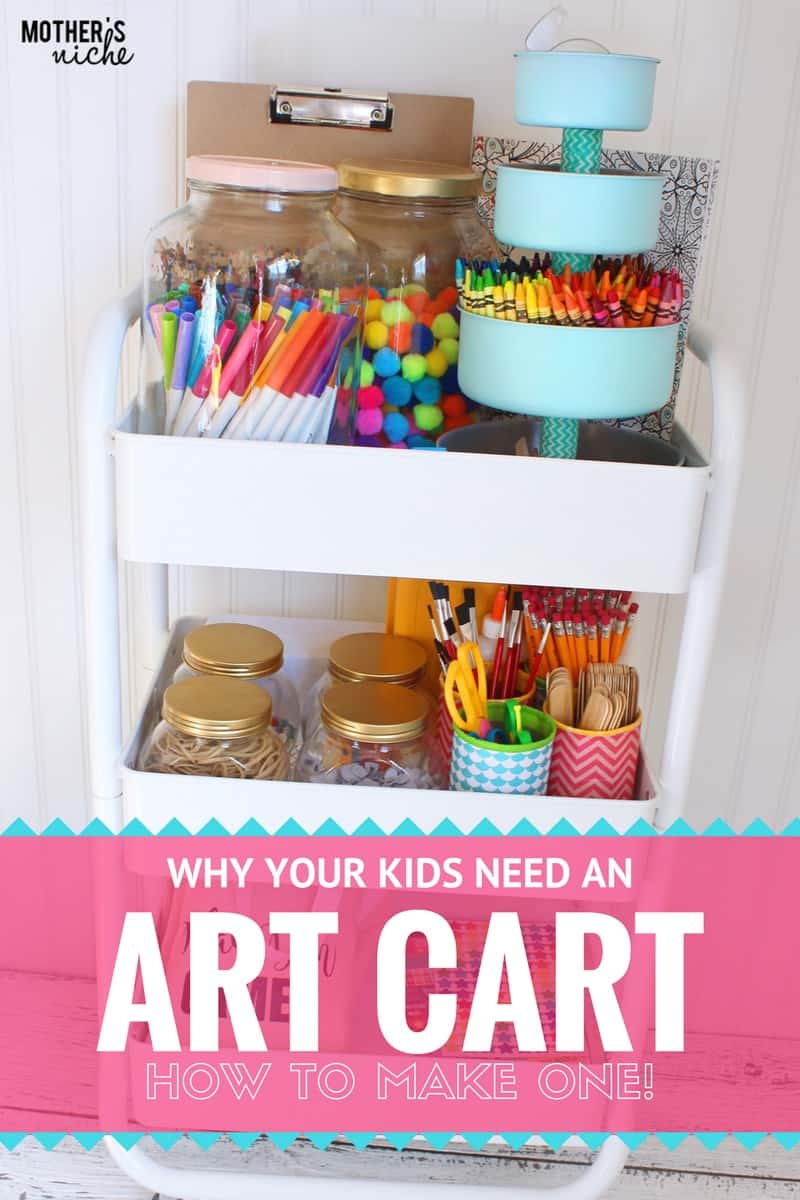
Want a way to encourage creativity and teach lasting skills? Make an ART CART! I keep my cart in the kitchen, near the dining table. For us it is the perfect place because I am in there all the time so it is easy for me to help when needed. Also it is a safe and convenient location for water coloring and messy projects. Our rules are simple. Art supplies and creativity happens at the dining table and then put all supplies back where you got them when you are done. SIMPLE and DO-ABLE! My kids loving having all the equipment in one place.
So, what's in my ART CART?
The cart itself was from Target but you can also find these style utility carts like this one at Joanns, Amazon, etc… I love these carts! They are sturdy and have rolling wheels on the bottom. The top has clipboards, coloring books, pickle jars full of markers and pom poms, and colored pencils.
These mats are actually flexible transparent cutting boards. I cut out the kids names with vinyl on my silhouette machine and personalized each mat. This is a must! It keeps your table clean and makes the clean up quick and easy.
I found some pint size penny candy jars and spray painted the lids gold. I filled them with googly eyes, colored Popsicle sticks, beads and buttons, and rubber bands. I used pringles cans to hold pencils, large Popsicle sticks, scissors, and paint brushes. I have step by step instructions at the end of the post for the pringles can make-overs.
The tiered crayon holder is made from metal bowls. I drilled a hole through the center of each bowl. The two center bowls had larger holes to slide a wooden dowel through. The top and bottom bowls had holes just big enough for screwing in the dowel to the top and bottom. First I screwed the bottom bowl to the dowel. Then around the dowel I slipped a piece of 1 inch wide PVC (3 inches tall) over it to keep the bowls separated. Then slid on the next bowl onto the dowel, and another piece of PVC, bowl and PVC again then the final bowl was screwed into the dowel. Nice and tight but be careful not to screw it in overly tightly or the wood dowel will strip! It was WAY easier than it sounds. And it turned out really cute!
I filled it with crayons galore, erasers, glue, tape and clothes pins. We have super strong tiny magnets on the refrigerator. The kids pinch their art with a clip and hang the clothes pin metal on the magnets. Easy and doesn't require hot gluing.
I filled the bottom with white copy paper, water color paint, stickers, and busy bags (we have the free busy bag printables here on Mother's Niche).
PRINGLES CAN MAKE-OVER:
You need: Half size pringles cans, washi tape and colored paper.
Step 1. Measure the can and cut paper slighting shorter strip from top to bottom.
Step 2. Wrap the washi tape around the top of the can. Then, fold the top into the can. Wrap washi tape on top of both sides of the folded tape to hold it down.
Step 3. Then tape or glue the paper into place. Done!
I love our Art Cart and my kids are loving it too! What would you add to your art cart?


