The toughest part about drawing a horse in 6 steps is getting the ratios right. To make this tutorial easier, I have broken the first step down into smaller steps to help you understand.
I love using my Huion HS611 graphics tablet and Adobe Photoshop. Let’s take a look at what supplies you will need for drawing a horse in 6 steps.
| Supplies | Reason for Preference |
|---|---|
| Drawing pencils | Check your local dollar store. There's no need to spend a lot on these at first, and a plain old pencil will do just fine. |
| White gel pen | Try a white gel pen; they’re great for adding highlights |
| Drawing paper of your choice | I usually opt for Bristol smooth because of its versatility. |
| Watercolor paint brushes | I use round brushes in smaller drawings because I can control the placement more easily. |
| Watercolor pencils | You only need about five colors but choose a few you really like. |
| Blending pencils or blending stumps | My hands are always a mess after drawing anything, but a blending stump or pencil is far more accurate than your finger. |
| Erasers | Moldable putty-type erasers and regular rubber erasers. |
I decided to use the buckskin coat color for my horse drawing. The beautiful color can be found in a wide range of breeds, including the Andalusian, the Morgain, the Tennessee Walking Horse, and the American Quarter Horse.
A buckskin horse ranges in color from pale tan to golden brown and always has dark legs, tail, mane, and muzzle. However, some have white on their legs and can also have amber-colored eyes.
1. Provide a Structure for Your Horse Drawing
As with all drawings, your first step is to create a structure. Even a simple drawing like a sunflower needs a framework to lay down details. Horses are more complicated to draw than a sunflower, so I have broken down the first step into several smaller ones. Remember to sketch very lightly because you will adjust and erase markings later.
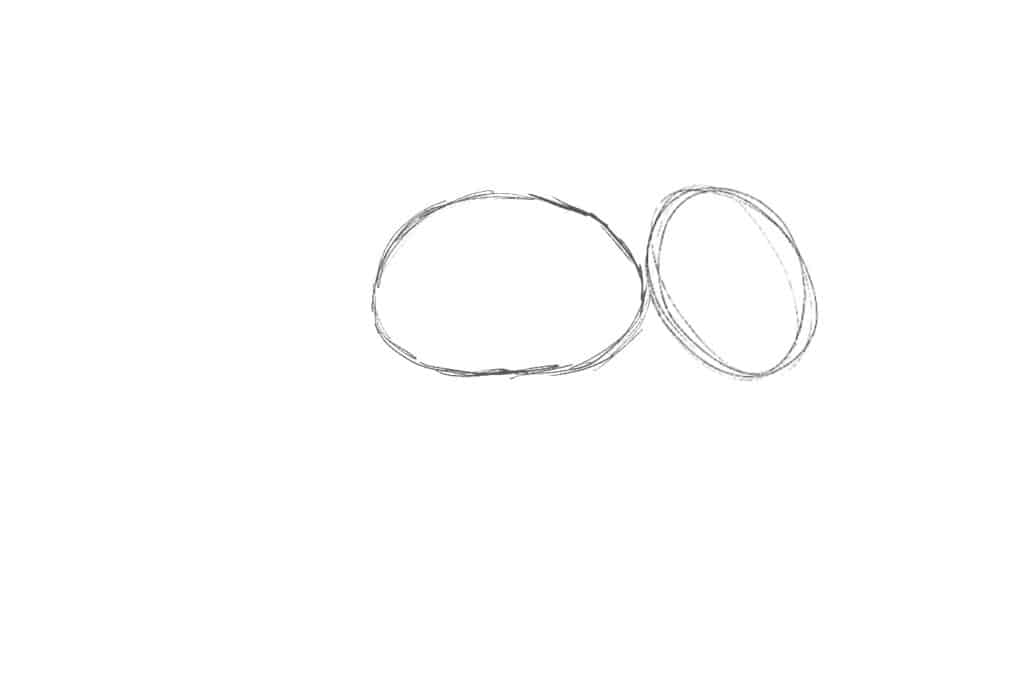
The Body
Begin with two oval shapes. Make the first one wider from side to side; make the second one smaller and sort of lean against the first oval. The two oval shapes will become your horse's body.
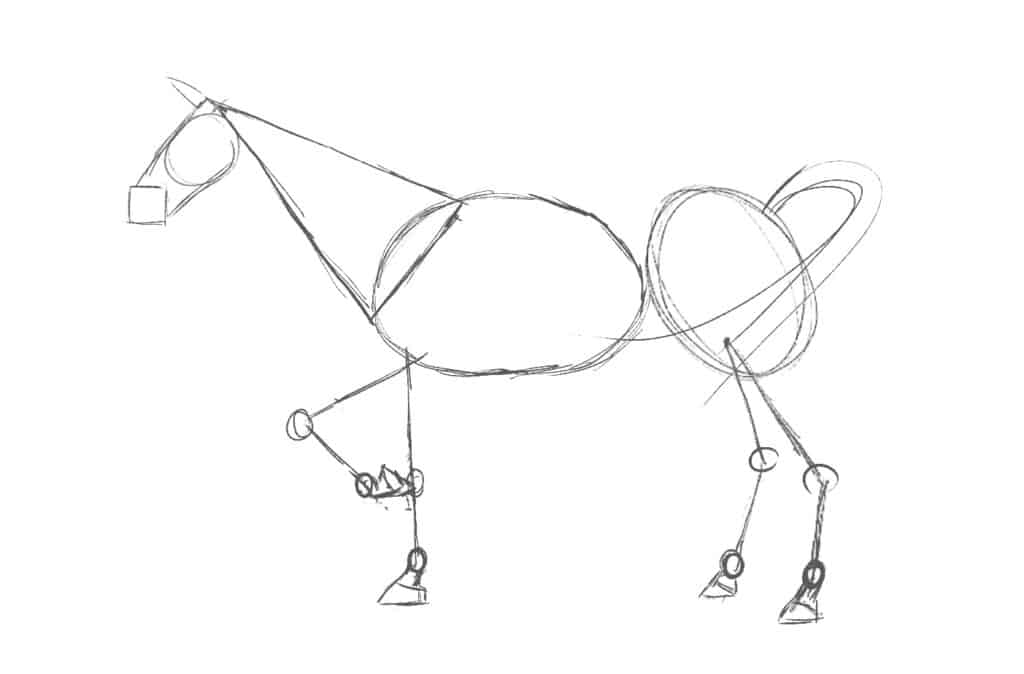
The Head and Neck
Once you are happy, in this step add a big triangle, a circle, and a square. The square will become the mouth, and the circle will be the jaw. Then connect them with two straight lines.

The Legs, Mane, and Tail
It might look like you are just drawing sticks and circles for the legs; however, think of it as a skeleton. The circles are joints, and the sticks are bones. If you want to, you can also add the tail and mane. Using circles as joints and straight lines for the bones helps give you better proportions.
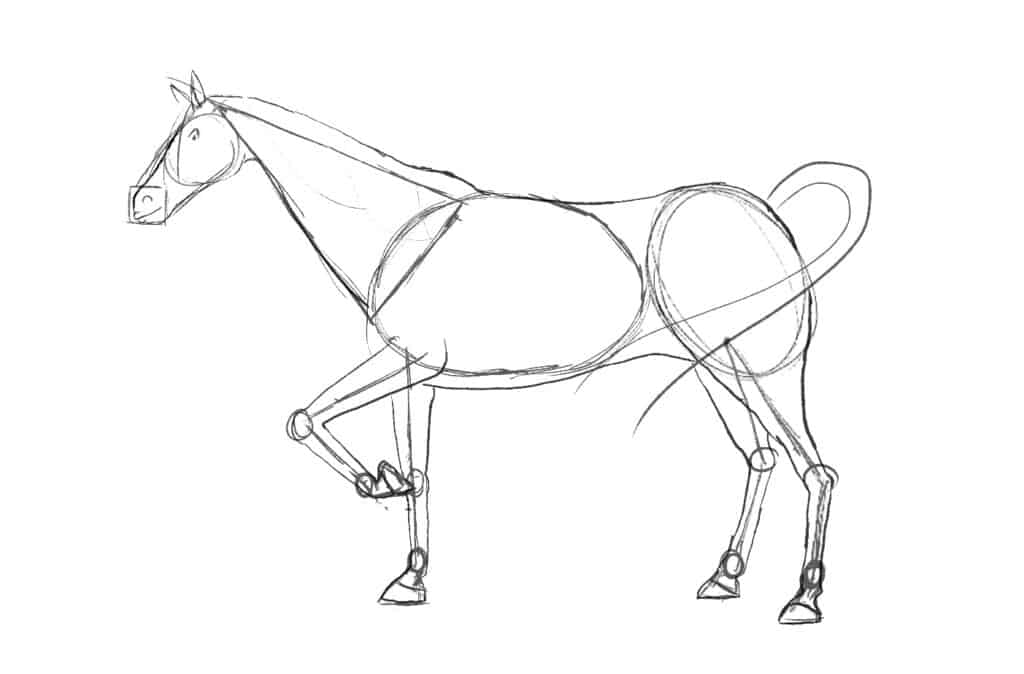
2. Sketch an Outline for Your Horse Drawing
At first, it’s difficult to get the proportions right for drawing a horse, or any other animal, in 6 steps. Be patient, with practice you will get it right. While drawing your horse’s outline, if it starts to look like a giraffe, go back to the previous steps and alter it.
Keep in mind that horses have rounded necks, so to prevent it from looking like a building block, curve the top line out a tiny bit. Furthermore, add a tiny hump where the neck connects to its back. That’s where its withers should be. By now it's starting to look more like a horse.
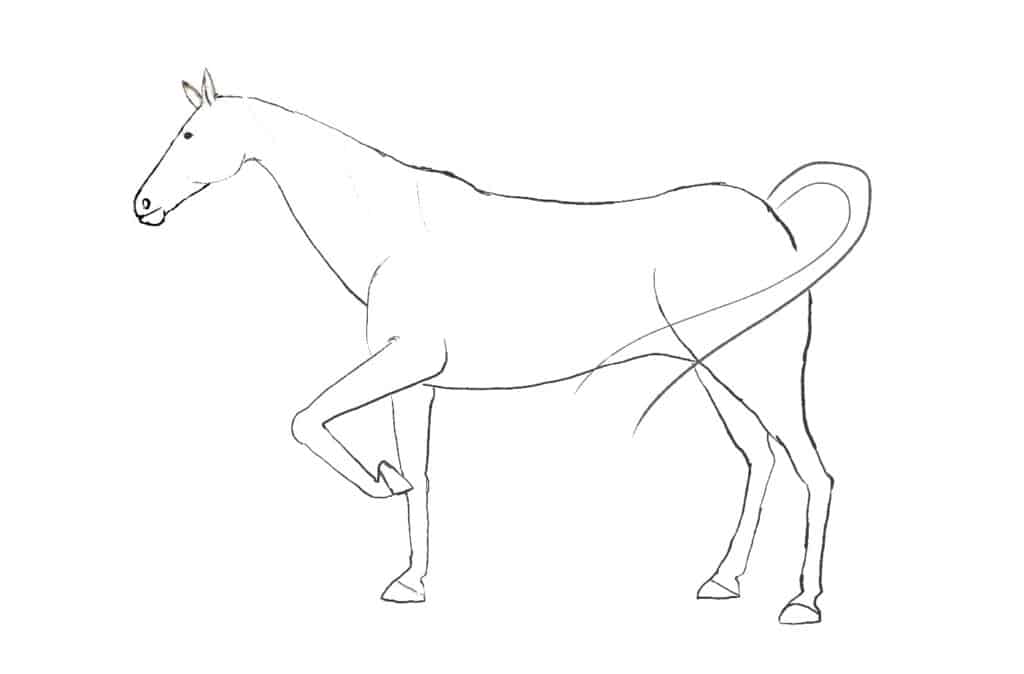
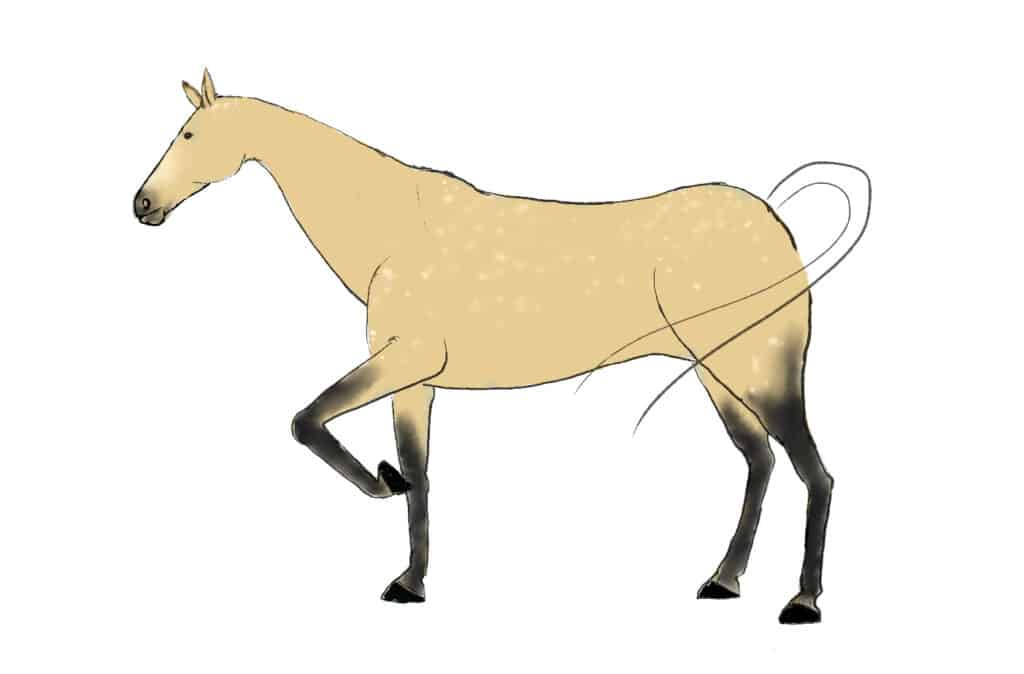
3. Remove the Shapes
Now we can remove the shapes we made earlier. Use an eraser and draw another clean outline over your horse sketch. If using a photo, double-check the nostril, eye, and ear. Make sure to draw slowly. Don’t forget to continue to draw lightly; this makes erasing easier. Horse's nostrils are big, and their eyes are almost on top of their heads. Remember not to put the ears too far forward; otherwise, it will look strange.
4. Adding Color to Your Horse Drawing
Adding color takes practice, so don’t worry if it isn’t perfect. I adore buckskin horses. There's something special about the contrast between the tail, dark legs, and mane, and the light-colored body. Wait until the very end, after you have shaded and highlighted almost every other part of the horse, before adding the mane and tail. Buckskin horses can be anything from a pale tan or yellow to a golden brown.
I chose a medium tan for the main coat color and black for the legs. However, if you want to do white legs, you can. The gene that dilutes the dark bay color leaves all the dark points of a bay-colored horse. Some buckskin horses also develop a bit of dappling, where the color has little spots. I think it's cute, so I added those too. While you are in this step, you should color the hooves black too.
Use a blending pencil or blending stump to blend the colors. However, if you don’t have one, you can also use your finger. As previously mentioned, sometimes buckskin horses have white faces or just a blaze, and they can also have white bits on their legs.
If you're using watercolor pencils, this is where I would typically take a paintbrush and very gently dab a little water onto the colors. It will make all the colors pop, and once it's dry, you can draw and blend shadows and highlights over the top using your blending stumps and white gel pens.
5. Creating Shadows
Learning to create shadows can be dreadful; however, there are a couple of great tutorials to learn the basics.
If you remember that light travels in a straight line, you'll realize that it's going to be strongest closer to the light source. This means that if the horse in your drawing is facing the light, the first thing to be “touched” by that light is its face. The horse's face is now blocking other things from getting light, like the bottom part of its jaw and neck, casting a shadow there!
In the illustration below, the purple lines represent the light. It should give you a better idea of how the light is going to work when you're adding shadows. I also included the mane and tail because those things tend to affect how the shadows land. Keep this illustration handy for the highlights in the next step too! Those light rays create all sorts of beautiful effects.
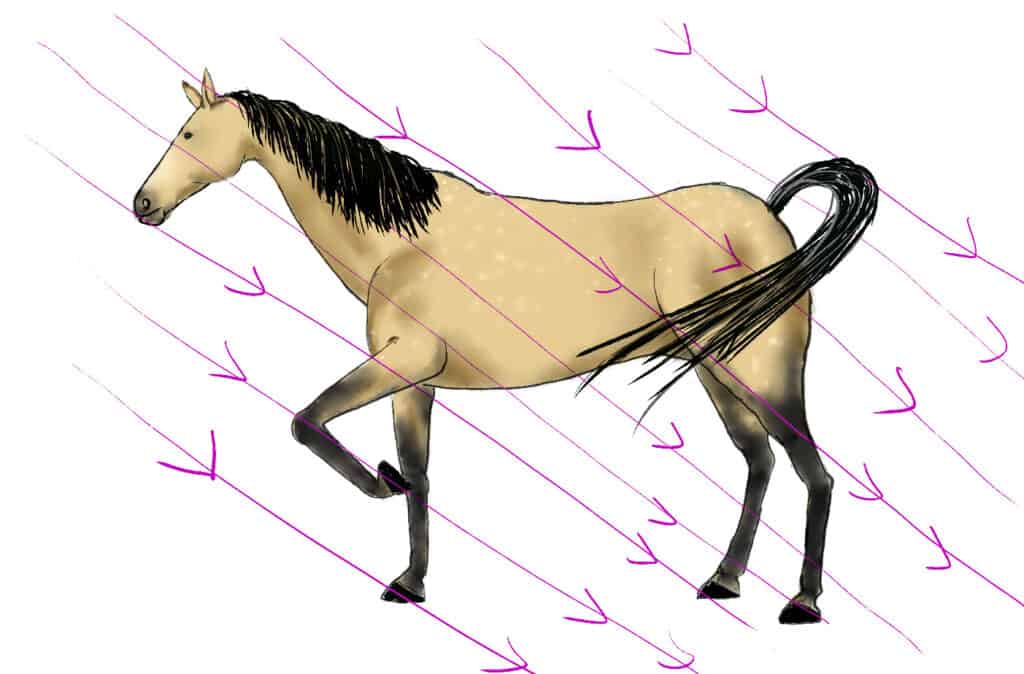
The tricky part with light is that it travels in a straight line, creating shadows where it does not touch the object. Don’t add shadows with a pencil; it might make your drawing look strange. Instead, use the same color that is used for the body and add more. Layer on the shadows, and you should receive the shadows that you are looking for.
Use black if you want to add a dark shadow as if standing in a shining light. However, be sparing with it. Next, you will blend all the shadows until they move in and out of the muscles to show strength. Shadows are darkest when they're furthest from the light; with that said, make those darker and let the shadows trail away as you move into the light.
Horses have big eyes, which follow into having big eye sockets. On top of the eye, draw a couple of curved lines. They should be big near the eye and get smaller towards the ear. Blend those in. You now see how the curve you created in the lines makes a rounded shape to the top of the eye. Underneath its eye, do the same thing.
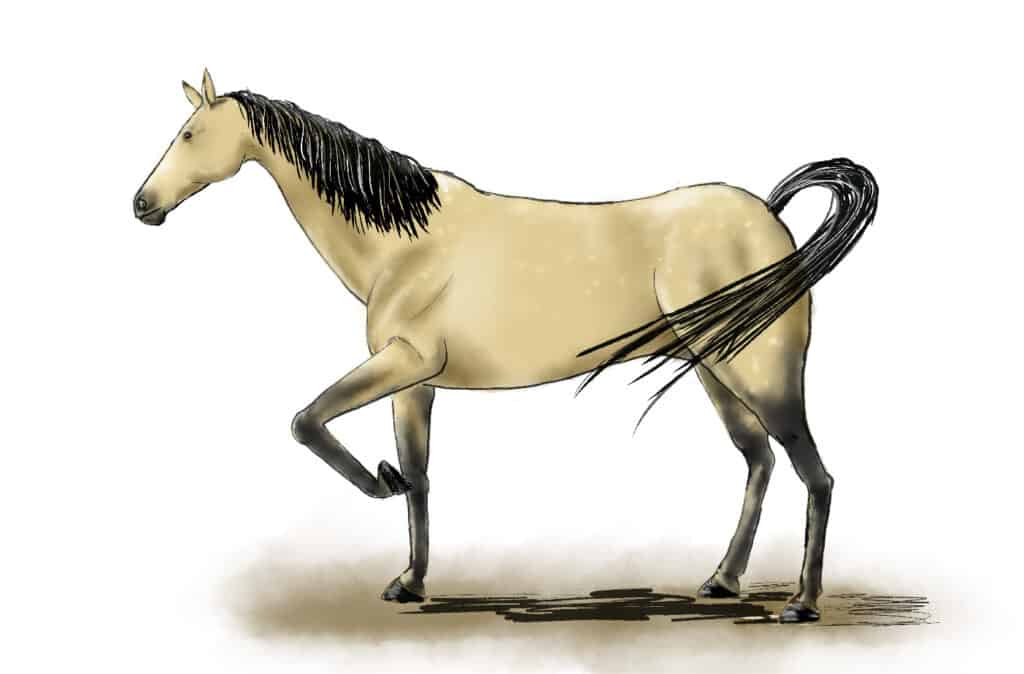
6. Highlighting Your Horse
Now we’re going to add some highlights. Looking at the image with the purple light rays, they were coming from the top left of the image. Let’s add some highlights to the face, legs, edges of its ears, and hooves. You’ll also add some to the tail and mane. Keep in mind that it is hair and will probably reflect a small amount of light.
Something that's often overlooked in drawings is that “edge” where the light just barely creeps around the edge of the object. Look at the horse's lower neck, chest, and thighs. You'll want a thin line of highlight along those edges.
When you highlight the eyes and hooves, don't blend them in as much as you would the highlights on the horse's body. The highlights on hard or wet surfaces, like eyes and ears, tend to have sharper edges.
And there you have it: drawing a horse in 6 steps. Put your horse drawing aside and take a look at it again in a day or two to see if you want to add any final touches.