I have always enjoyed fantasy books with unicorns, so I decided on the modern Western concept of an enchanting horse with a horn. I used Photoshop with my Huion HS611 graphics tablet for all 6 steps to draw a unicorn. It is an affordable tablet and works well. Unicorns have a long history, and artists enjoy writing stories and drawing them. Let’s take a look at the 6 steps to draw a unicorn.
Supply List
As artists, we all have a personal preference for the types of materials we like to use. Below is a list of supplies I prefer.
| Supplies | Reason for Preference |
|---|---|
| Drawing paper | Drawing paper needs to be thicker than standard notebook paper. Using something like Bristol smooth or even watercolor paper works. |
| Watercolor paint brushes | I would use small round brushes for this project, and most others using watercolor pencils. |
| Drawing pencils | Until you've had some practice, buy inexpensive pencils for drawing. |
| White gel pen or white pencil | One or both are necessary for final highlights. |
| Watercolor or colored pencils | Gold for the eyes, horn, and hooves; black, yellow-brown, cream. |
| Blending stumps or blending pencils | The blending stumps or pencils give more control than just using your finger. |
| Erasers two types | The regular rubber kind and the moldable putty type. |
1. Use Basic Shapes to Create a Structure
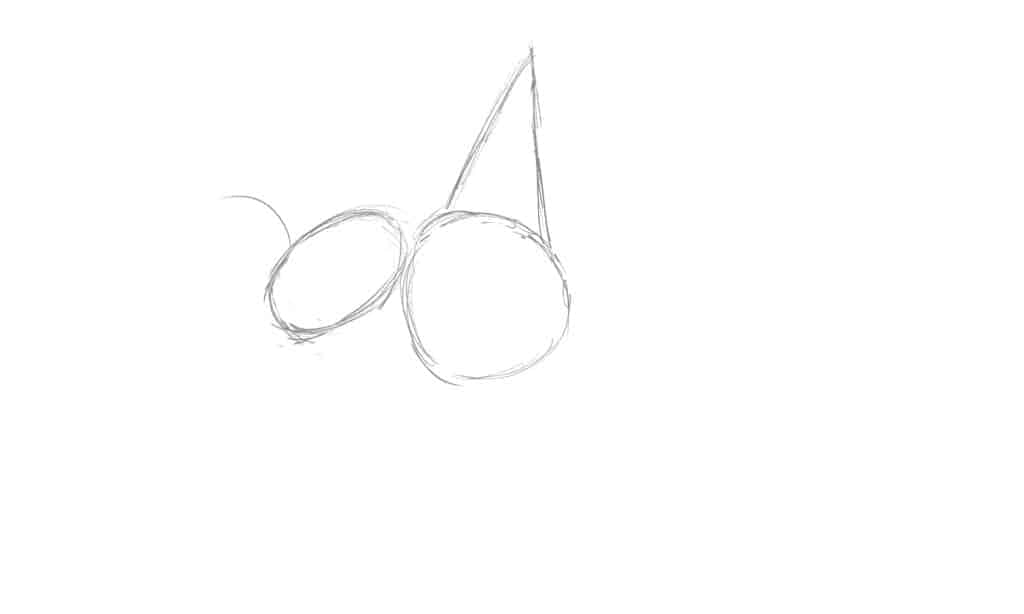
In this drawing, the unicorn is moving towards you at an angle. It’s changing direction in a half-trot, half-hop sort of way. The neck triangle is more upright than out to the side, and the circles are close together, with a larger size difference between the chest and rump circles.
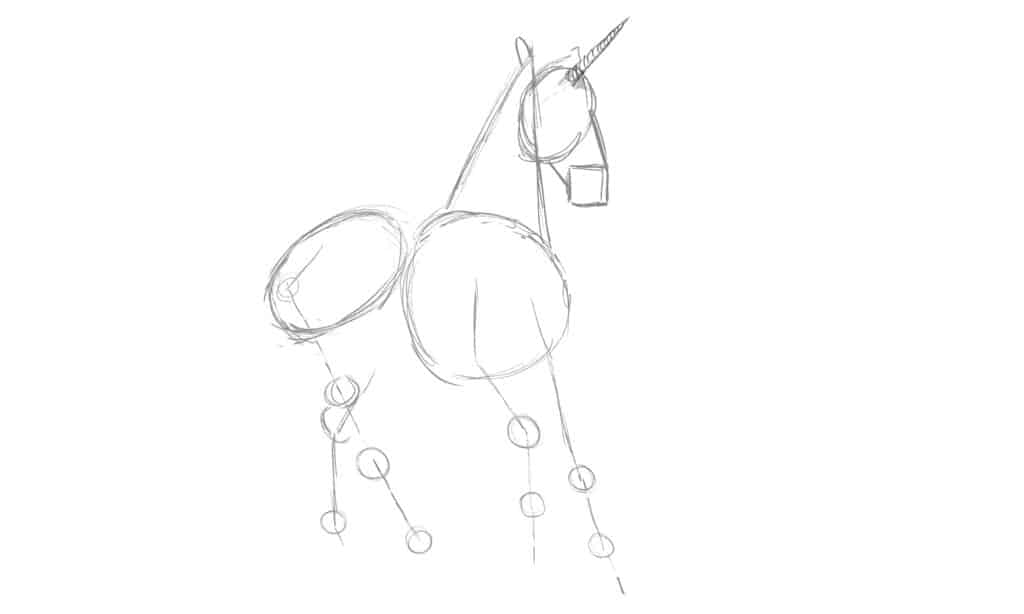
Next, add the horn, legs, head, ears, and muzzle. The stick-figure legs are a rough illustration of the major joints in the unicorn's legs. To help you picture the joints, draw a circle at each spot on the legs where a joint exists. It will make the proportions easier to judge.
- Digital artists: Create a separate layer for the body and another for the legs. That way, if you need to adjust something, it's easier.
- Paper artists: Draw lightly so you can easily erase them later. These aren't going to be permanent.
2. Sketch the Unicorn Outline
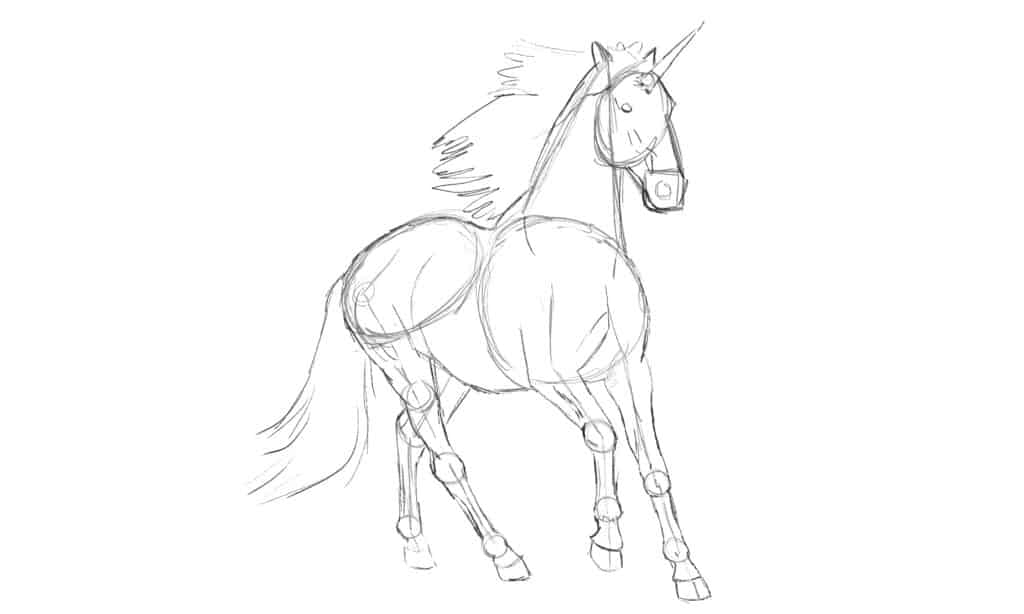
Now it’s time to use the basic shapes you drew to help sketch a rough outline. First, round the neck's top line and the whithers (where the shoulder blades show) at the base of the neck. On the unicorn drawing's legs, draw the areas between the joint circles smaller than the joints because joints tend to be more prominent. Remember to include the mane and tail.
By now you should have something that looks like a unicorn.
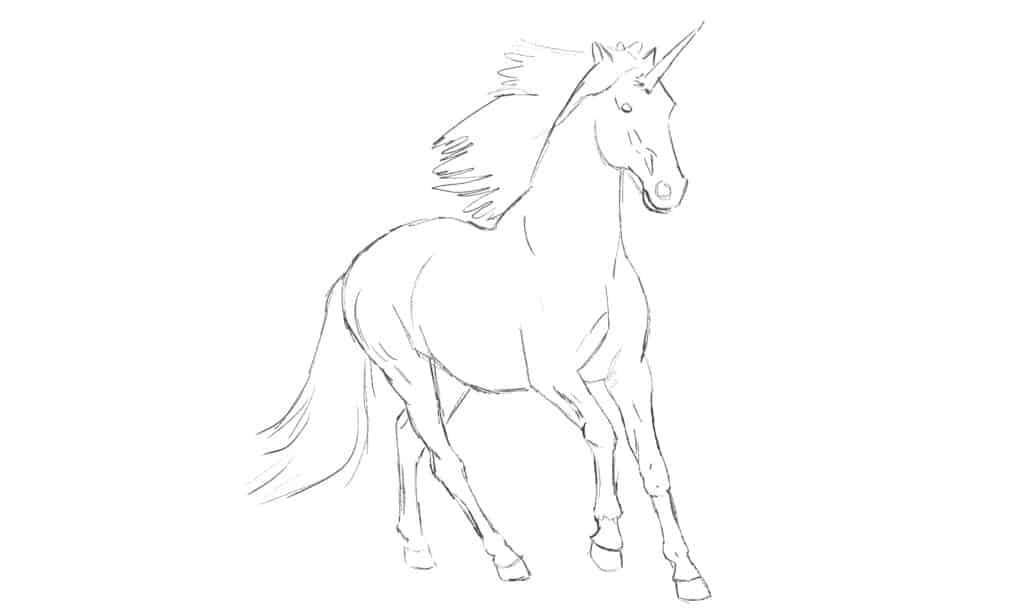
Next, you're going to create a clean outline by erasing all the underlying structures and basic shapes. Here I added a little bit of muscle and tendon definition; however, you can always wait to do that until after you add color.
- Digital artists: Create two new layers when you sketch the outline. The first one is for the first outline sketch. It's usually fairly rough, and it's easier to clean it up if you do the final outline in a new layer. When you're happy with your outline, simply turn the layers with basic shapes off so they're no longer visible.
- Paper artists: When you sketch the outline, expect mistakes. Draw very lightly, so it's easy to erase and fix things you don't like. Once you are happy with your outline, remove the basic shapes.
3. Add Color
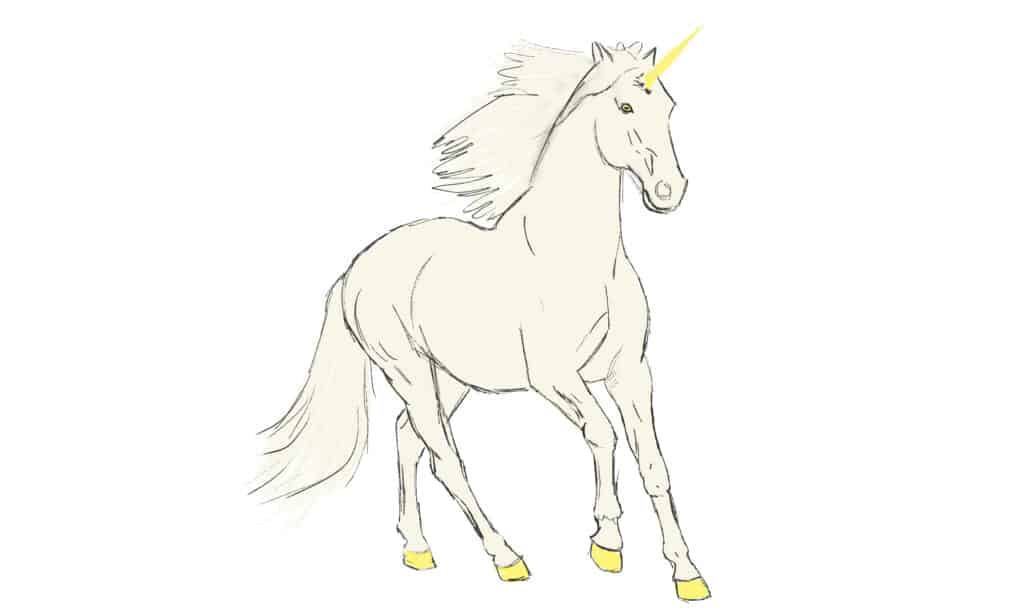
This next section can be a little hard. Usually, western unicorns are white. It can be hard to tell the difference between the background and the animal unless you're drawing on colored paper with gel pens or white pencils.
To help, I left most of the outline intact. I also used a color closer to ivory instead of a snow-white base color. Next, add yellow to the hooves, eye, and horn later; we'll add more color for more depth.
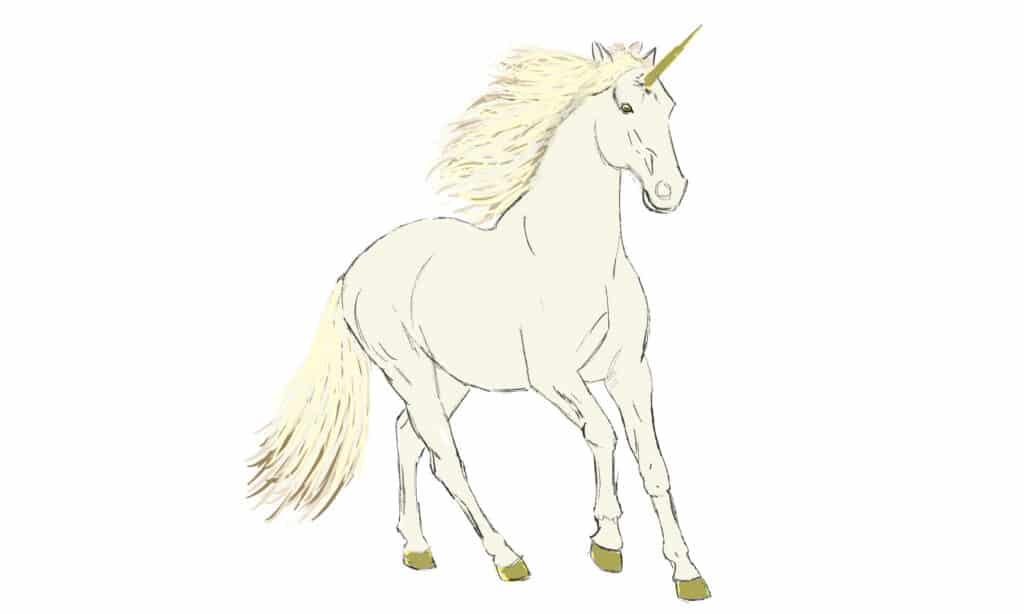
When drawing a mythical animal, you can be as creative as you like. Just be mindful because when you add shadows and highlights, you may need to adjust the shadow colors a little.
Here I added a couple of different layers of color to the tail and mane. It's kind of an ivory base with some darker strands for depth. Next, I added a light layer of gunmetal gray to the yellow to give the bronze-gold color to the hooves.
- Digital artists: Create three new layers: one for the body, another for the mane and tail, and one more for the hooves and the horn.
- Paper artists: Build up the mane and tail gradually. It won't look right if you are too heavy-handed.
4. Creating Shape With Shadows
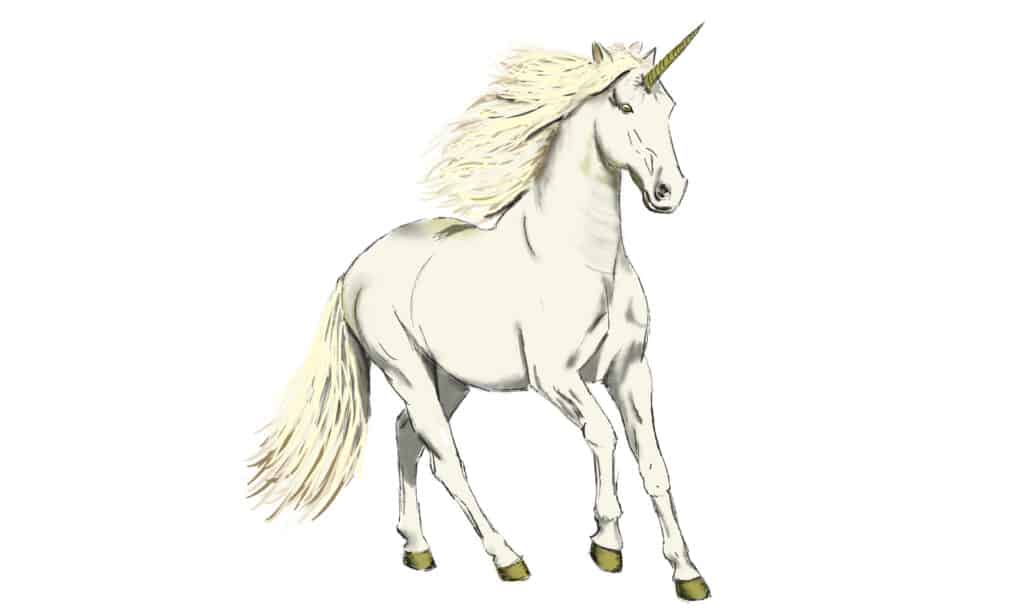
Next, we are going to create shadows to make a three-dimensional shape. It is important to remember where your light source is coming from. Drawings that do not have highlights or shading look two-dimensional and flat. We want the unicorn to look as though it could trot off the page.
In this drawing, the light is coming from above, just in front of the right shoulder. The light is quite bright, so the shadows under the mane, tail, and hind legs have harder edges. Additionally, add a small amount of shading around the joints and muscles in the legs and chest.
Shadows under the hind legs and tail with a hard edge don't need much blending. However, others need to be blended, like those around the front of the chest and inside of the unicorn drawing's ear. You can always blend them in more but start with less.
Other areas that need shading are:
- Inside the ear
- Mane and tail
- The base of the mane along the top of its neck
- The area behind the eyes
- Horn and hooves
If the shadows don’t look dark enough, then slowly add a little more at a time. However, if you have added too much, then you can erase it digitally or with a moldable putty-type eraser.
- Digital artists: Create a new layer for the shadows and set it to multiply. This makes the layer transparent and adds color to the layers behind it.
- Paper artists: For drawings with more delicate base colors like this one, it’s best to use a blending stump with only a little bit of graphite already embedded in it for shadows. This allows you to build up the shading slowly without blowing out any details you already have in your drawing. If you need a darker shadow, use a very sharp, very soft graphite pencil (like 6B) and gently draw the shadow. Blow off any excess graphite. If you brush it off, it may smudge.
5. Highlights
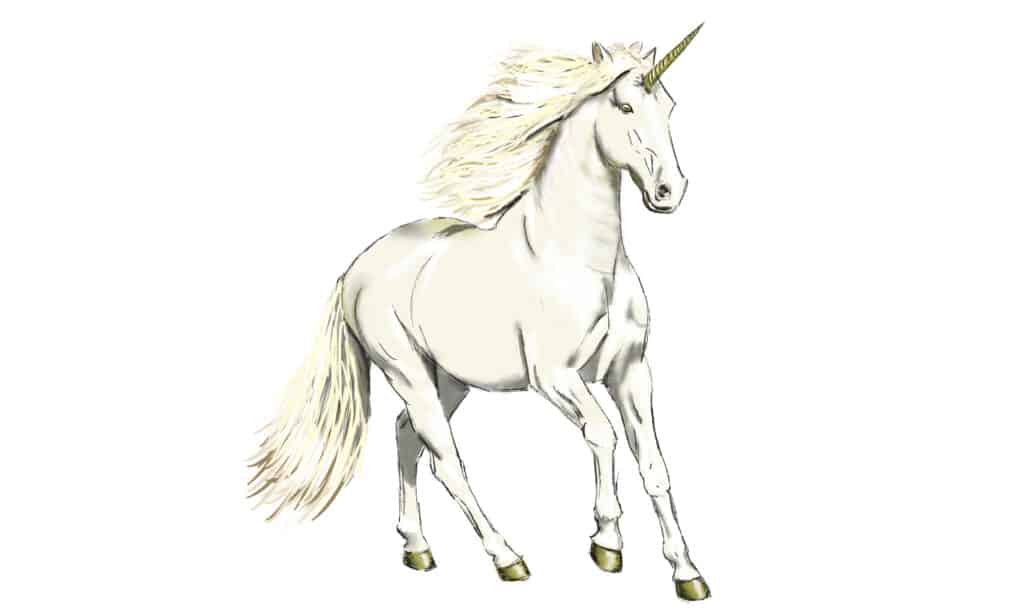
It can be difficult to add highlights to a white animal. If your animal has a snowwhite base, then it’s best to have less shading for highlights. That's why I decided on ivory instead of pure white. It's much easier to highlight and looks white enough to pass as white.
The unicorn needs highlights in several areas:
- Tops of the leg joints.
- The top of the mane, where the sun hits it.
- On the hooves, horns, and upper 1/3 of the eye.
- Leading side of the legs.
- Forehead, muzzle, and tips of ears
- The lower end of the tail, where the hair is bending upwards a little.
- On the top of the mane, where the sun hits it.
- The upper portion of either side of the chest.
Most of the highlights are softer, so blend the edges a little. However, the horn and hooves are hard and shiny. To make them look shiny, don't blend the highlights; just draw them lightly in curved lines. It’s your work of art, so if you feel it needs more highlights, feel free to add some more.
Before moving on to the next step, put your drawing aside and take another look at it in a day or two with fresh eyes.
- Digital artists: Highlights also need their own layer. It's easier to correct problems when you have everything separated.
- Paper artists: Use your moldable eraser to pull the color out of areas where you want highlights. However, highlights on the horn and hooves may be better done with a white pencil or white gel pen. Start with small amounts and increase gradually until it looks right.
6. Completing Your Unicorn Drawing
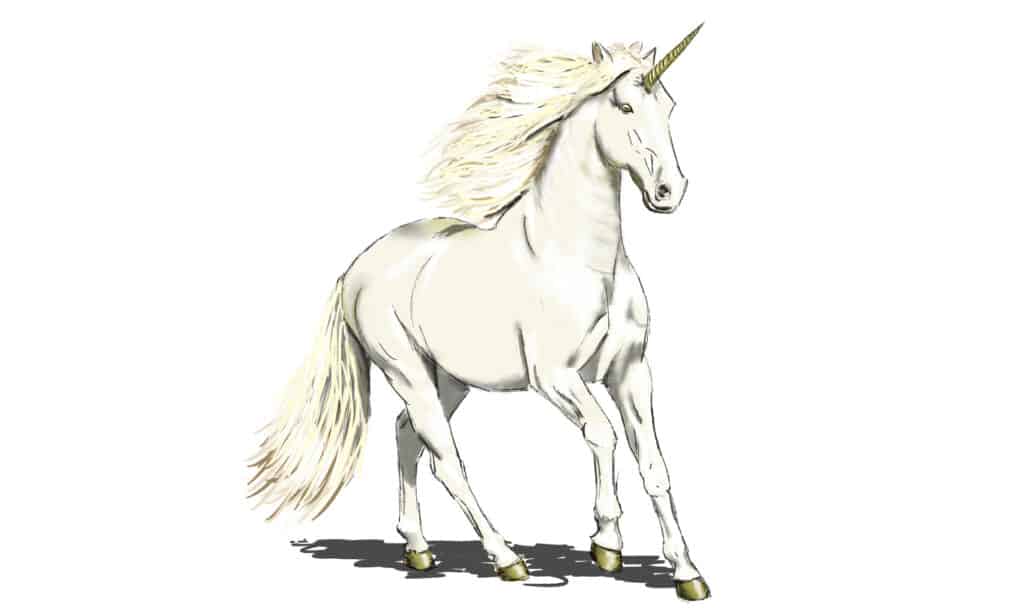
Now that you have returned to your 6 steps to draw a unicorn picture with fresh eyes, you will be able to see if there are any final touches you want to add, such as extra or less highlights and shadows. As a final touch, you could add a shadow to the ground underneath the unicorn.
Well done, and enjoy your work of art! Remember to keep practicing. Vincent Van Gogh and many others spent years improving their skills. If you enjoyed drawing this unicorn you may want to try drawing a dragon next time.