Dogs are referred to as man's best friend. They have so many different expressions. One minute they are zooting around like mad things, and the next minute they are focused on something else. They even have facial expressions, showing signs of when they are looking to cause trouble. Dogs are special like that, and most of all, they also show you unconditional love. Let's take a look at how to draw a dog in 7 easy steps.
Supply List
In Photoshop you'll find a picture of this cute dog and I created it using the Huion HS611 drawing tablet, which is my favorite. However, the same methods can be applied to paint, pencil, and watercolor. Here’s a supply list I have put together for paper media:
| Supplies | Reasons for Preference |
|---|---|
| Drawing pencils | Find some you enjoy working with. I've fallen in love with wood-less graphite, but a standard cluch pencil is also great. |
| Drawing paper | It doesn’t matter which type of paper. Use whichever one you enjoy working with. Sketchbooks and watercolor paper work too. |
| Watercolor pencils | Fortunately, buying a decent set of watercolor pencils doesn't cost much. They're easy and fun to work with. |
| Erasers | There are two types of erasers you will need. The moldable putty type and a normal rubber eraser. |
| Blending pencils or blending stumps | These are more efficient than your finger. You'll need them to highlight and blend shadows. |
| White gel pen | You'll use this to add highlights. |
| Watercolor paint brushes | Round watercolor brushes are what I usually use for precision; however, wider brushes would be necessary for larger pieces. |
1. Start by Creating a Structure
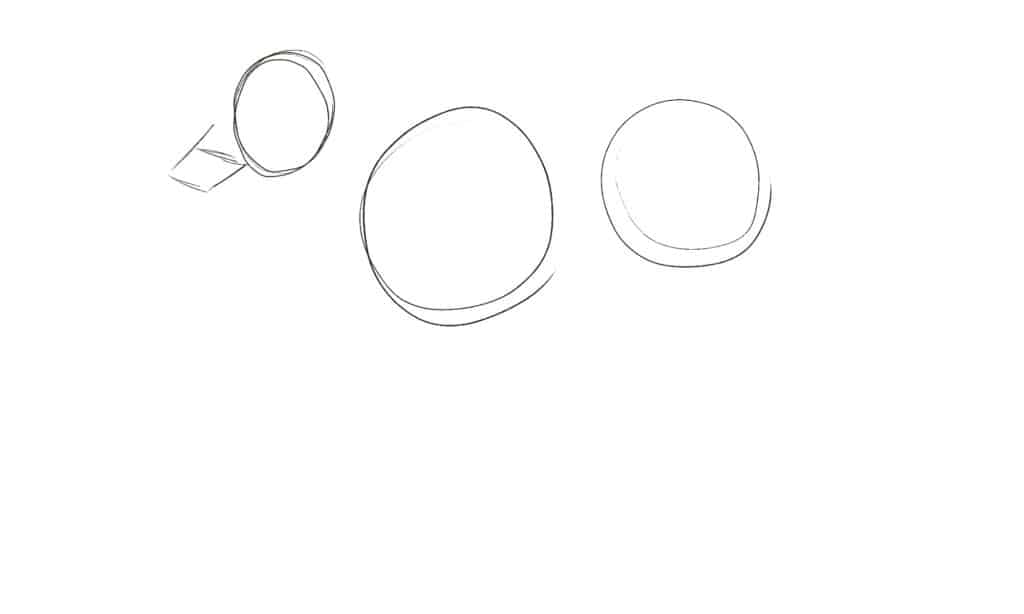
The first step is to start with a structure. Draw your circles for the body, rump, and head. Next, create a diamond shape for its nose. Remember to draw these shapes lightly; otherwise, these structural shapes will be difficult to get rid of when you don't need them anymore. Take your time creating your foundation.
Add the Tail, Legs, and Ears
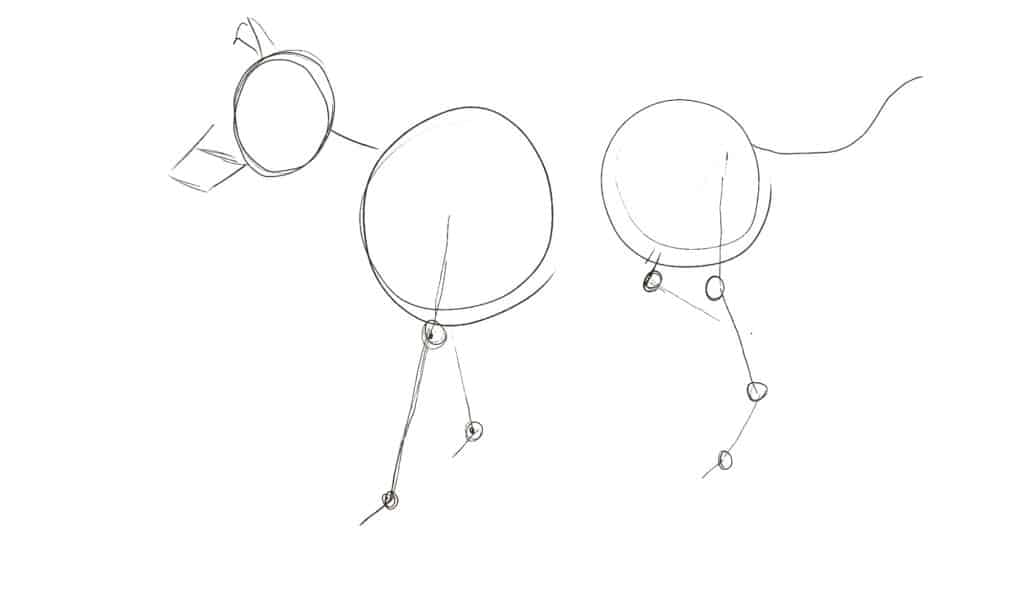
Next, draw straight lines that connect through small circles for the legs. These lines will act as the big bones in the leg. Take your time when drawing the legs. These tiny circles will help place the joint properly. Keep in mind that all four-legged animals have hips, wrists, knees, and elbows just like we do. They're just slightly different to ours. Next, add the ears and a tail swish.
2. Sketch an Outline
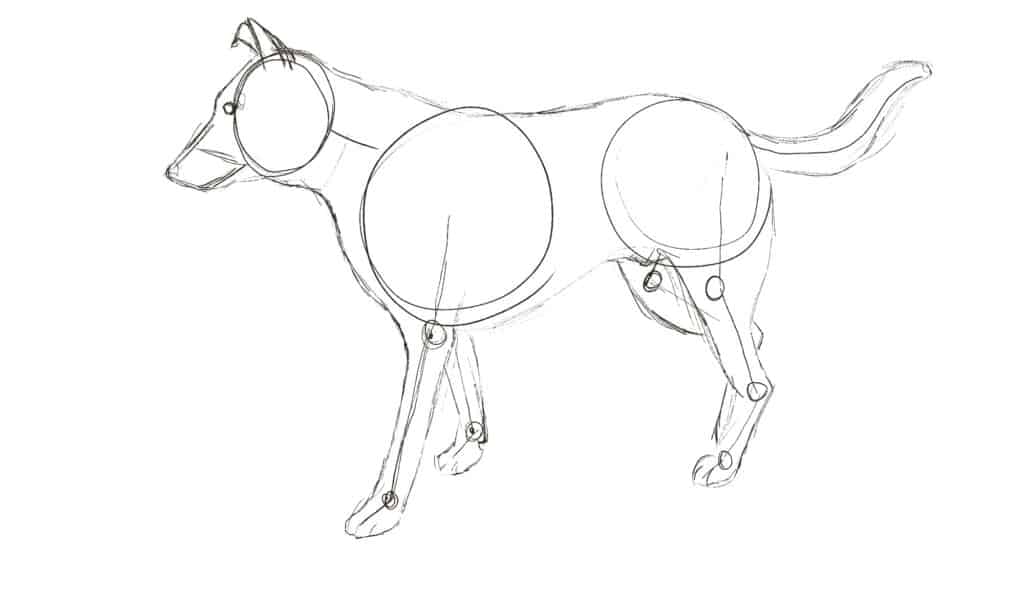
It's time to add the outline next, as your dog drawing has its bones and body ready. Remember to sketch lightly, because you are going to erase a lot. Control your pencil by using small strokes. Next, you're going to connect the nose and head shapes to give it a brow line. When you draw around the tail and legs, make sure to draw enough space so you can see it has muscle and flesh. Then, to create a silhouette of the dog, you're going to connect the rump and torso circles.
3. Rub Out the Inner Circles
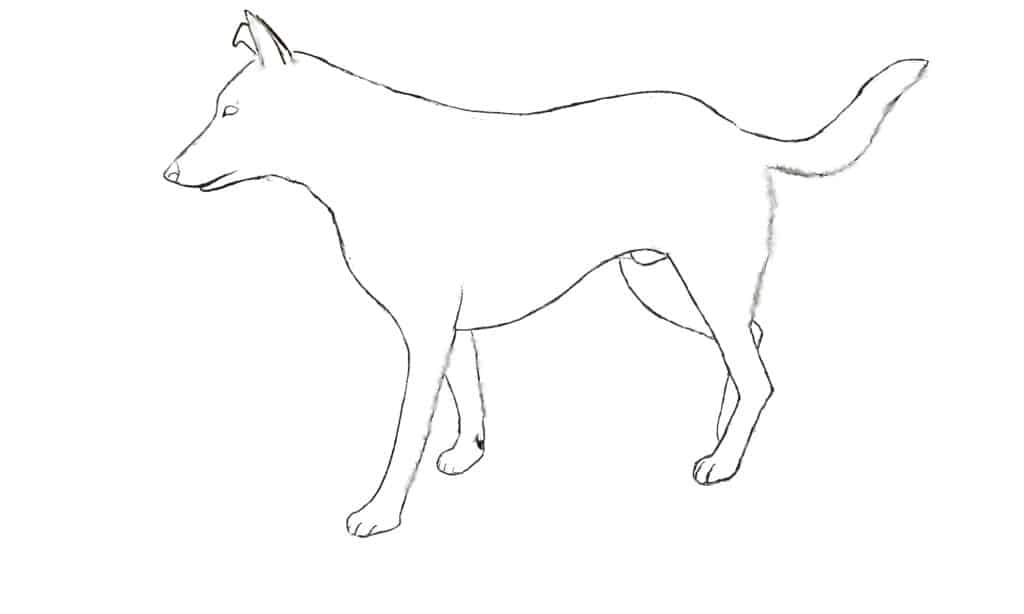
This part isn't difficult, but do it carefully. Rub out all the circles and leg lines. You can see that my line is a bit messy on the back sides of the legs and tail. This is because dogs usually have fur that sticks out in those areas.
4. Add Color
Now, decide what color you want your dog to be. I wouldn't recommend black for your first drawing because black animals are difficult to draw or photograph correctly. But go ahead and choose any other color. First, you're going to fill in the outline and blend it. The back legs, bottom edge of the tail, and stomach shouldn't stay completely in the lines.
In the direction that the dog's fur grows, gently blend the colors if you are making a spotted dog. Next, add a small amount of pink to the center of the ear, then blend slightly from the outside of the ear towards the center. Now it's time to add the dewclaws. Most dogs have dewclaws on their front legs. These usually help the dog when it runs fast. Using a different color, add spots on the muzzle where the whiskers go.
Paper Artists: Start with lighter colors first if your dog has a multi-color coat. It's much easier to color over it with darker colors than to remove color. To blend the coat colors use a pencil or blending stump then drag them over the edge of the lines where the fur sticks out.
Digital Artists: Create a new layer for the color and place it below the outline.
5. Add Shadows to Shape
Shading is not always easy to do. First, think about the colors being used. Here are some guidelines.
- Is the shadow falling over a blue wing? Draw the shadow in a deeper blue.
- What if a brown dog's leg is in shadow? Use a deeper brown.
Think about the effect you're trying to create. If it's night and the only light is from a streetlamp 80 feet away, then your shadows will be an inky black.
However, this dog is outside on a bright day. So the light is coming from the front and slightly above. It could be cloudy, so there aren't too many hard-edged shadows. Always remember to think about the light. To figure out where to place shadows, ask yourself, where is the light coming from? What area is it hitting first? Once you know, start adding your shadows.
Dogs usually have muscular bodies. Sometimes, they get a little bit chubby because we often give them snacks. A dog that's in good shape has a strong chest and shoulders. The stomach doesn't hang low and goes up in the hind legs. Blend these types of shodows from the darkest edge towards the light source to feather them out and give your object shape.
Paper Artists: Sometime between the time you add the color and finish the shadows, use a damp paintbrush to dab at the colors. The watercolor pencils you're using actually need that step, or they will look very faded.
Digital Artists: Create a layer for the shadows, set it to “Multiply,” and place it above the color layer.
6. Highlight the Details

It might seem as though adding highlights should come before that shadow. After all, don't you have to know where the light is in order to create the shadows? While it's true that you have to understand where the light is coming from, adding highlights to an unshaded drawing is almost a distraction from the drawing itself. So, I do the highlights after the shading.
Keep the light source in mind when you add highlights. Add white to the areas closest to the light source. They’ll generally be opposite the shadowed areas, and the closer you are to the light, the brighter the highlight. If it helps, draw very faint lines from the light source diagonally, as you see in the previous step.
So, blend the highlights in a way that will help give shape to your dog drawing. Add highlights to the following areas:
- The top edge of the tail
- Forehead, nose, and top of the muzzle
- Front and tips of ears
- On the rump and up to about the center of the back
- Front of legs, tops of paws.
- Front of the chest
Some highlights are very thin and subtle. That's why I wait until the end to do highlights. They'd be destroyed by the shadows when I blended them into everything else.
Paper Artists: To add highlights, use a white gel pen. If you're comfortable with acrylic paint, you could also use white acrylic for highlights. Water it down just a bit, and add it layer by layer.
Digital Artists: Create a new layer on top of everything for the highlights. Use white, and gently blend as appropriate.
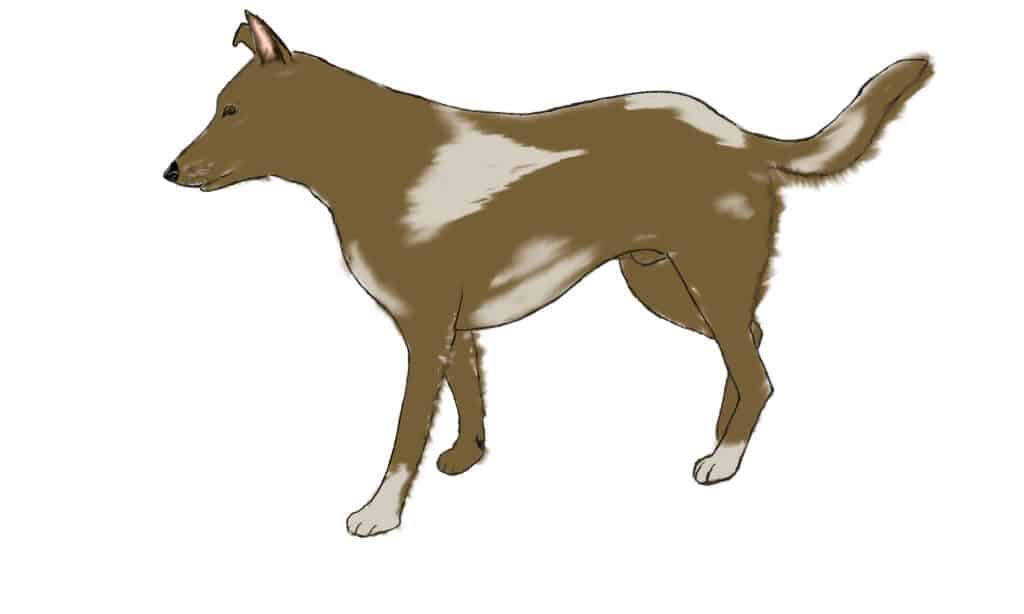
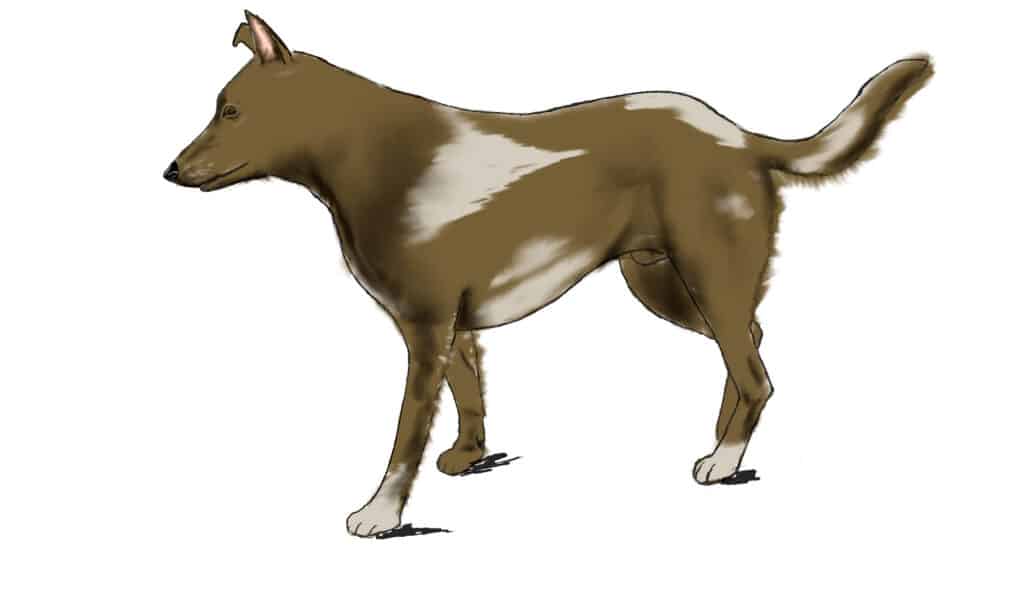
7. Completing Your Dog Drawing

Before you add any extra touches, take a break and have a cup of coffee. It's easy to overdo the highlights and shadows, when you have been staring at the same thing for a long time. Next, take a closer look and decide if you want to add fur to the tail and legs. To do that, you can just use a pencil and draw fine lines. Maybe next, you should add some whiskers to the chin and muzzle. Draw fine lines; don't make them too long though dogs whiskers are shorter than cats.
Last but not least take a look at the eye. Does it need a little more highlighting? It might, and an eye without a highlight does not look alive. You would be amazed at how much of a difference that makes.
Paper Artists: Be gentle; you probably don't need very much.
Digital Artists: Do the whiskers and additional fur in a new layer between the color and the shadow layers.
Finally, there you have it how to draw a dog in 7 easy steps.