It takes a lot of patience to draw a wolf. They are also super intelligent, and you can see it in the way they look at you. Although their body type is similar to that of a dog, you need to keep in mind that their appearance is scruffy yet beefy. Let’s take a look at the 8 steps to draw a wolf.
Here is a list of supplies that should help you get started.
| Supplies | Reason for Preference |
|---|---|
| Drawing paper | Pick a paper you like. It should be thicker than notebook paper and handle the stress of redrawing and erasing. |
| Watercolor paint brushes | Small detail brushes are what I would use for this. |
| Drawing pencils | Start with inexpensive pencils once you get more experience, then buy nicer ones. |
| White gel pen or white pencil | We will use these for highlighting. |
| Watercolor or colored pencils | Reddish brown, brown, black, cream, and gold for the eyes. |
| Blending stumps or blending pencils | You can use your finger; however, I find that the blending stumps and pencils give me more control. |
| Erasers two types | The moldable putty type and a standard rubber type. |
1. Create a Structure to Build an Outline
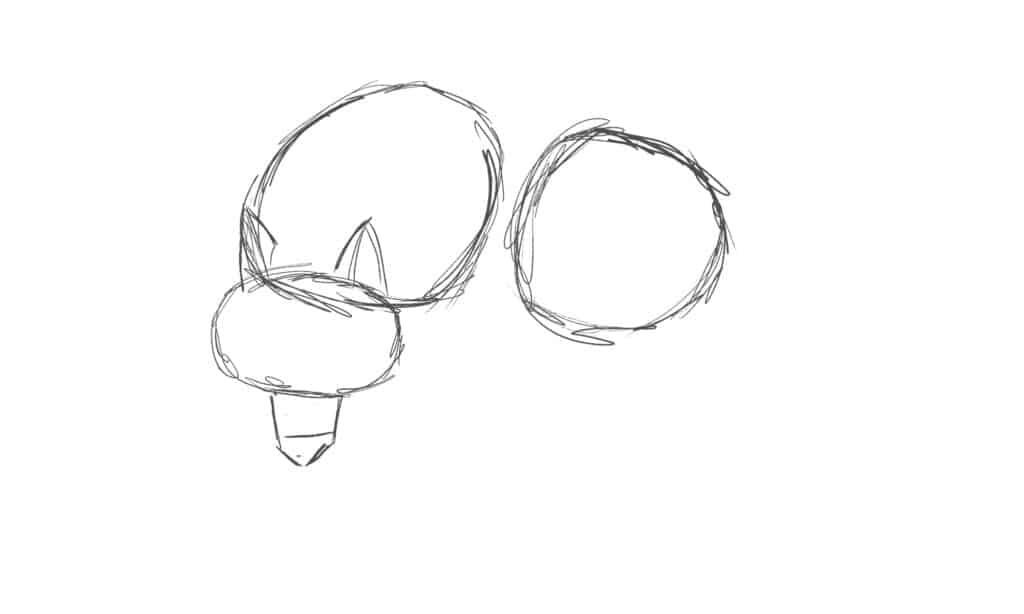
First, draw a few shapes lightly to represent the basic body parts. These will be removed later. The rump and body are two big circles, where the body is bigger. Next, make an oval shape for the head because the wolf's fur sticks out around the cheeks. Then draw two triangles for the ears, a slightly slanted square for the snout, and another triangle for the chin.
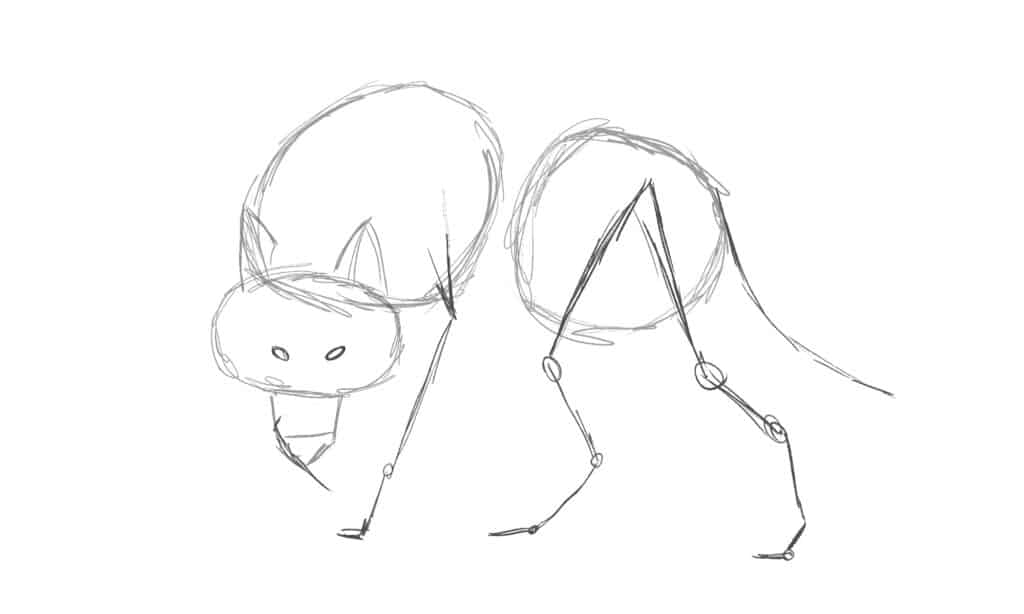
Next, in a skeleton style add the legs. Four-footed animals have almost the same joints in their legs as we do in our legs and arms. The difference is they are elongated. Some are missing what we call either a thumb or big toe, but animals in the Canidae family have dewclaws — the thumb/big toes. Some have dewclaws that are only attached by skin, while others are fully functional claws. The point was simply that while bodies change appearance, the underlying structure is still recognizable from one mammalian species to the next.
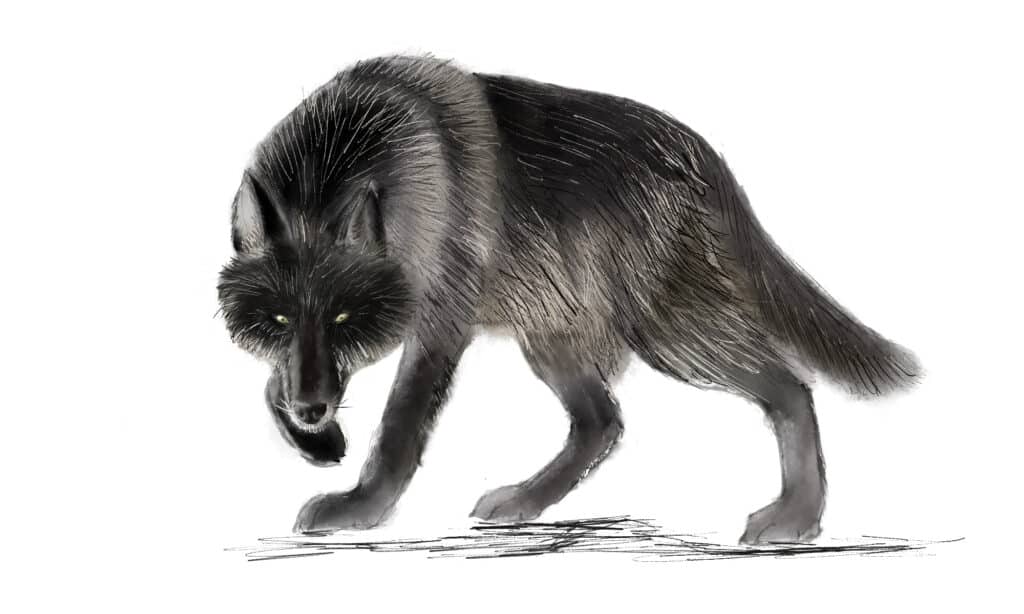
2. Sketch the Outline For Your Wolf
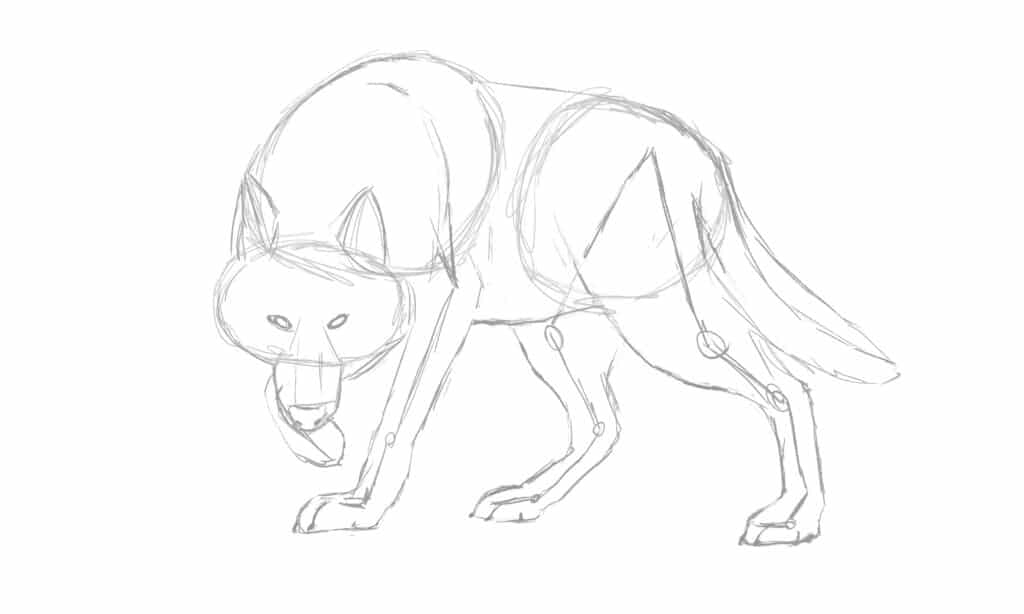
Next, create a rough outline of the wolf using the basic shapes as a guide. If the torso circle doesn’t cover enough ground to give the impression of a strong animal, adjust your outline.
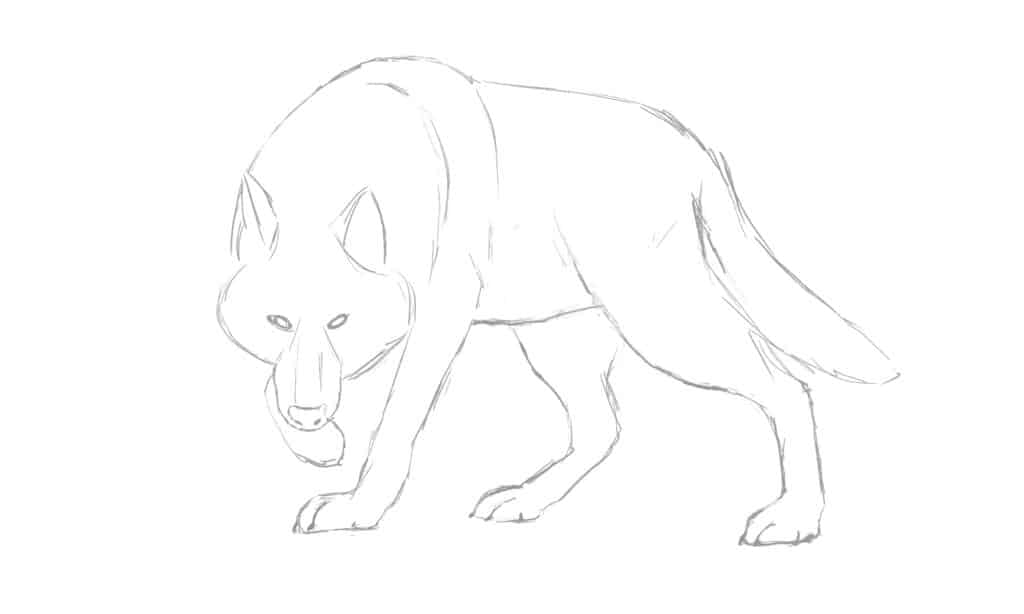
To get a better idea of a wolf's overall appearance and body language, it would be a good idea to look at a few photos. Now that you have your outline, it’s time to remove the basic shapes. If you want, you can redraw the outline a bit darker.
3. Add Base Colors
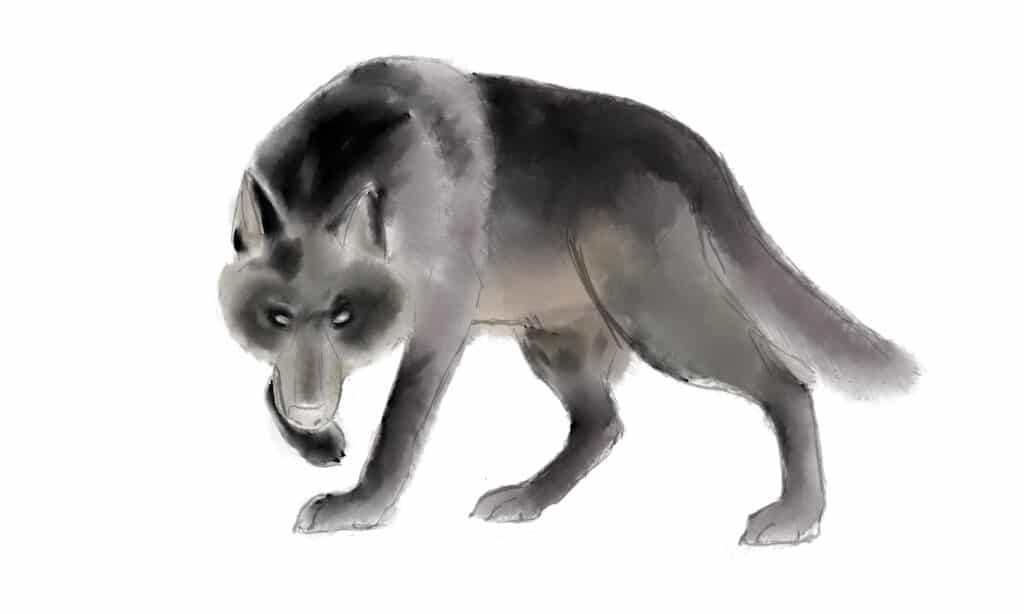
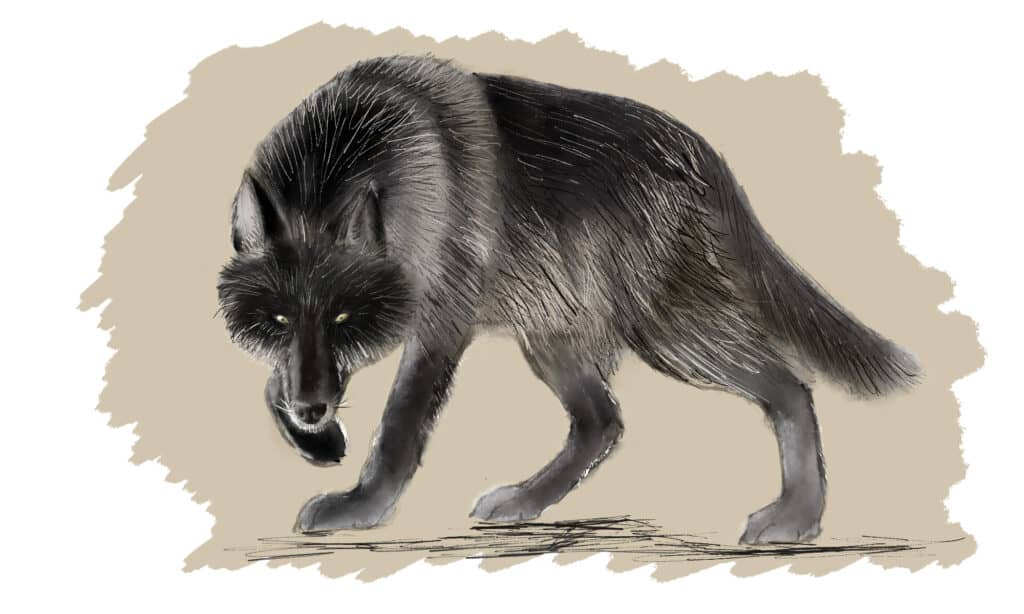
Wolves' underbody and legs are usually lighter. Their coat is similar to a husky with dense undercoats and thick guard hairs over the top.
A lot of the color you see in a photo comes from the guard hairs, but as the animal moves, guard hairs move, allowing you to see the undercoat. How much of the undercoat you see depends on the body part. For example, the belly is nothing but an undercoat, but the guard hairs on the back and sides are densely packed.
Add different shades of black to the face and saddle areas; also add it to the legs if you like. Take note around the shoulders, where the undercoat lightens up at the edges of the shoulder blades. The wolf's shoulder blades move as the wolf does, causing the guard hairs to lift and allowing you to see lighter undercoat colors.
Blend all the color edges. Make them flow nicely from one to the next. Also, blend the bottom edges of the ear on the far left into the head; if you don't, you'll end up with a very dark ear that doesn't seem to match the other items.
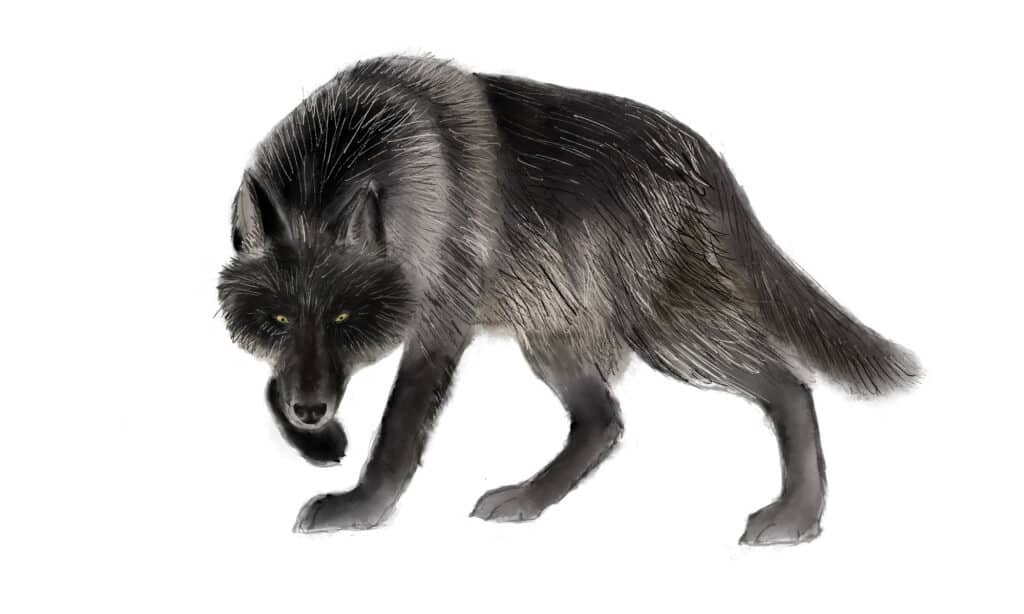
4. Face Details
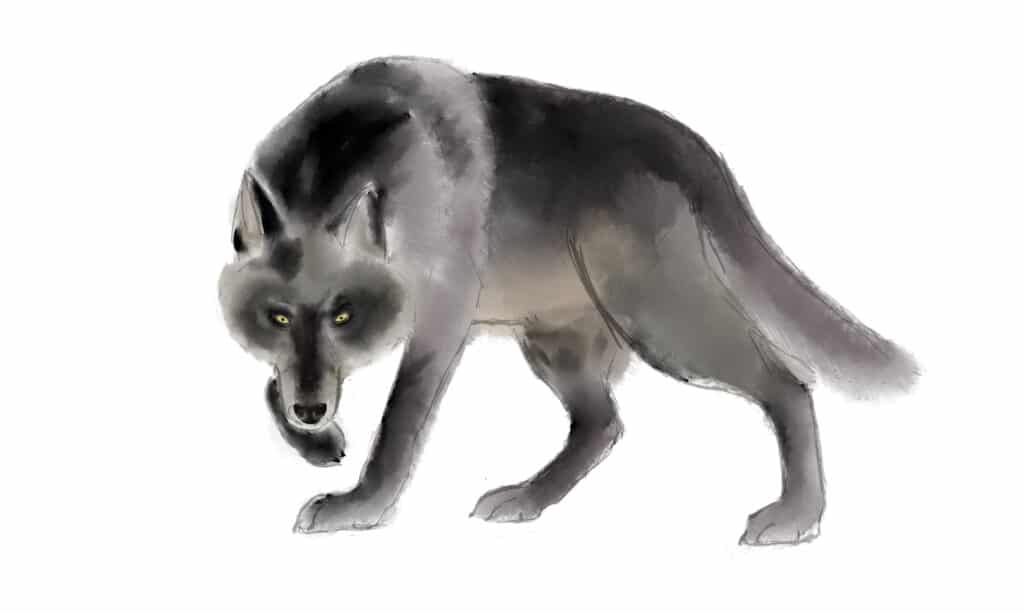
If you look closely at your wolf drawing, you will see the eyes are yellow but haven’t got any depth yet. Drawing the nose can be quite difficult. With that said, take your time doing the nose.
It may seem premature to add highlights to any part of your wolf drawing; however, taking care of the nose and eyes earlier in the process helps me draw the rest of the wolf more accurately.
Remember that wolf and dog noses are moist, and it's obvious in photos. Start by drawing the nostrils on the wolf's nose by coloring two diagonally placed ovals in black, then highlight the inner and top edges in a curved shape using white or by erasing some of the black with a moldable eraser. Soften the edges of the highlights and then have a good look at it.
At this point, you'll want to blend the sketch into the body in strategic locations. The best places to start are:
- Near the base of its ears.
- The back edge of the far right leg.
- Along its belly, where it crosses in front of the leg.
- The lower edge of the tail.
- Digital artists: Create a group of layers for the nose and the eyes and take the time to rename each layer. Your wolf will have at least 10 layers, so grouping them will help you keep everything sorted.
- Paper artists: When you draw the nose, start with a light layer of black, then darken the nostrils gradually. You won't have as much to remove for highlights if you build it up a little bit at a time.
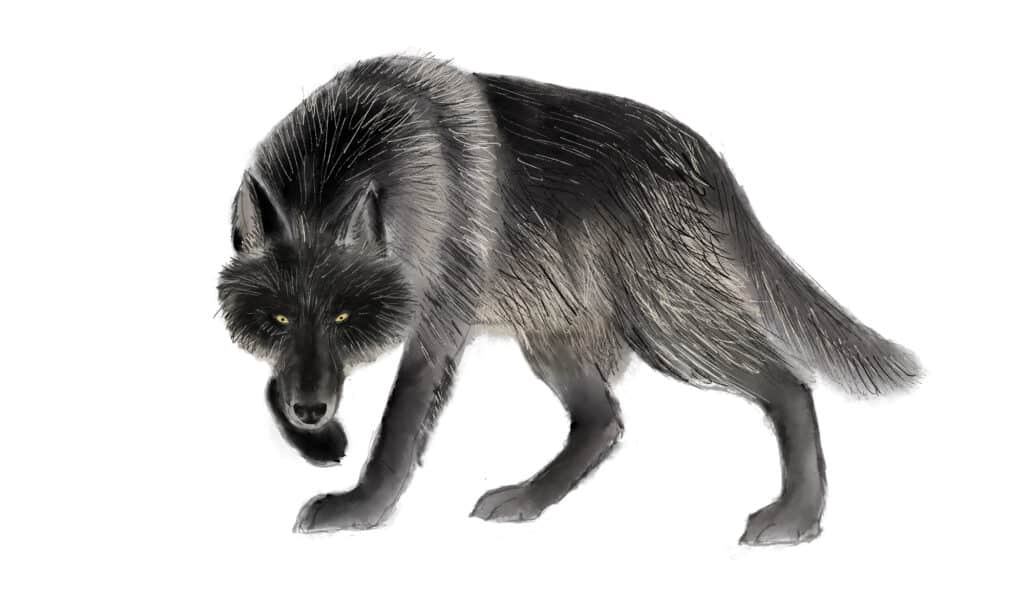
5. Gradually Create Depth
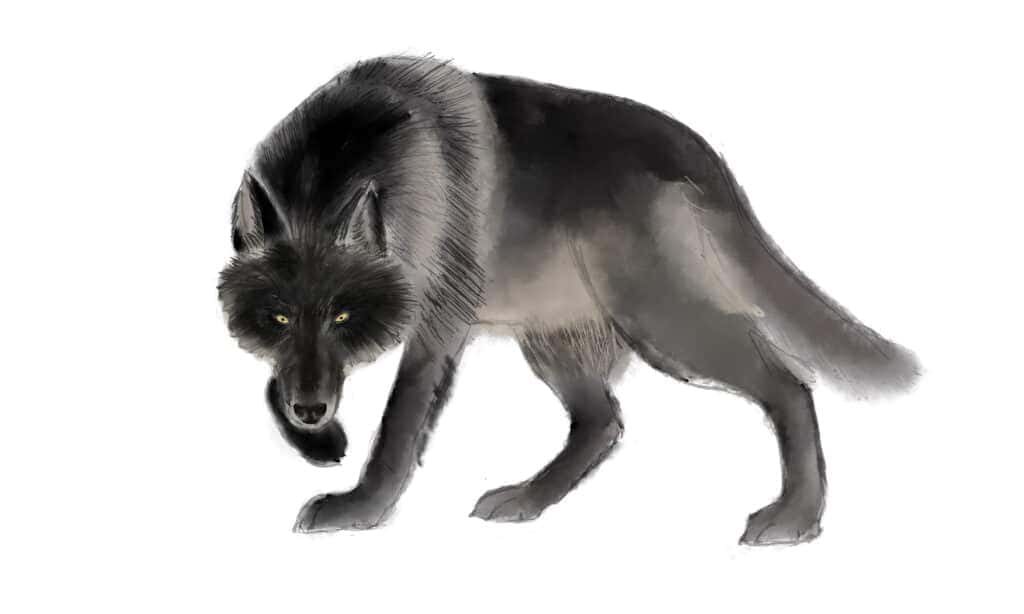
Next, we are going to add the wolf’s shaggy coat on the left. The thick, fluffy undercoats with tough guard hairs help protect them in harsh weather conditions. Their guard hairs are not all the same color; therefore, it helps them to blend into their surroundings.
I drew some of the guard hairs on the left to give me something to work with. We don’t want them to look like dreadlocks, so draw them in quick, short strokes.
Build the coat up layer by layer, starting with a mid-tan color. Begin at the tail end of the wolf and gradually build up the coat with a medium brown for the guard hairs; this way the fur looks a bit more natural.
Draw them in the direction of the fur; it doesn't all go in the same direction — there are spots where it grows at a different angle. How much of this you do and how long you draw them will determine how shaggy your wolf's coat looks.
Next, you will spend a little more time adding the black guard hairs. This is because they are the main color.
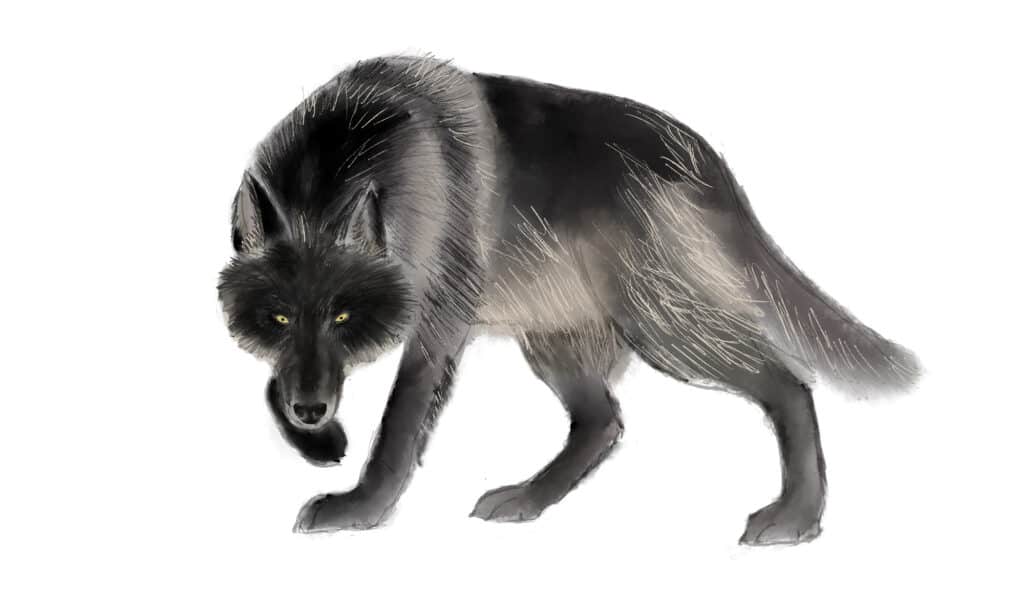
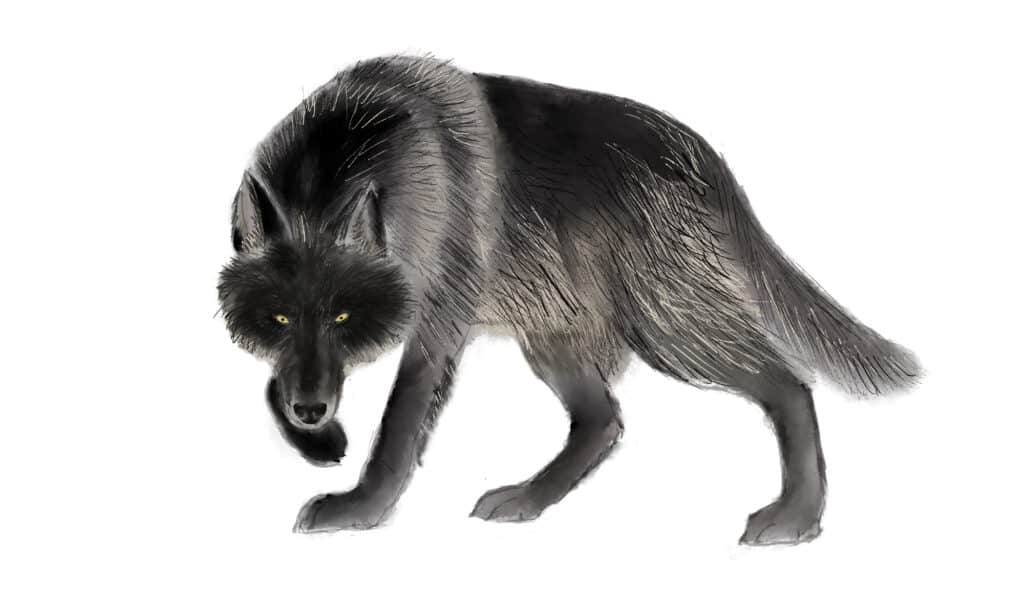
The final layer of guard hairs is part of the highlighting. The majority of black wolves have silvery-white shimmers in their coat. However, you notice this more where the light hits. With that said, add more silvery-white on the left along the bottom edges of its cheeks towards the back.
- Digital artists: Create a new layer for each guard hair color.
- Paper artists: I use white pencils for these, but you could also use a toothpick with a little Titanium White paint. However, the paint is more difficult to control, so a white pencil is your best bet if you're new to this.
6. Add Shadows To Your Wolf Drawing
Next, we are going to add a few shadows; take care not to smudge the other layers too much. In your wolf drawing, the shadows are deepest, further away from the light. In this case, it's coming from the left, just above and behind the far left shoulder. Softly add darker areas on the right of the snout, legs, and bottom of the eyes.
- Digital artists: Create a new layer for the shadows and set it to “multiply.”
- Paper artists: Adding shadows to fur requires a little care. Try to add it just at the base of the guard hairs, but if you make a mistake, it's okay; just pull out some of the shadows and try again, then redraw a guard hair or two.
7. Highlights
Add a few final highlights — not too much though. Remember, the light is coming from the left. So, add a little along the far left shoulder, snout, and left edge of the paws. Finally, add some long whiskers and a few small ones around the chin.
- Digital artists: This should be its own layer.
- Paper artists: Using either a white pencil or gel pen, gently add highlights. Remember to go slowly; gel pens can't be reversed.
8. Finalizing Your 8 Steps To Draw a Wolf
As always, take a few days away from your wolf drawing and come back with fresh eyes. You might want to improve it by adding a few extra highlights. If you feel it needs a little bit extra, then go ahead. Make it your work of art and have fun with it.