With Thanksgiving around the corner, why not sit down with the kids and make some turkey crafts or follow these 6 easy steps to draw a turkey? As previously mentioned, for tutorials I use my Huion drawing tablet and Photoshop. It makes it easier because you can work in layers. However, if you prefer paper, remember to sketch lightly so you can adjust the lines and erase them.
Did you know that wild North American turkeys are very smart and have better color vision than humans? They're completely different than the commercially raised version. These birds are sly and always on the lookout for a predator, yet much of that caution goes out the window during mating season. While the females are drab-colored and camouflage astonishingly well for such a large bird, the males stand out. They have a fabulous mating display that might even compare to a peacock's.
Supplies
| Supplies | Reason for Preference |
|---|---|
| Drawing paper | Use your favorite paper, thicker sheets are best. My favorite is Bristol smooth. |
| Watercolor paint brushes | Use a smaller round brush on this because of all the little details. |
| Drawing pencils | Cheap drawing sets from Amazon or a dollar store will work fine. |
| White gel pen or pencil | Gel pens or white pencils are great for highlighting things towards the end. |
| Watercolor or colored pencils | Black, brown, dark reddish brown (mahogany or the like), tan, red, blue, and cream. |
| Blending pencils or blending stumps | These are precise, which I like; however, you could also use Q-tips or your finger. |
| Erasers two types | The standard rubber erasers and moldable putty type. |
1. Create a Structure
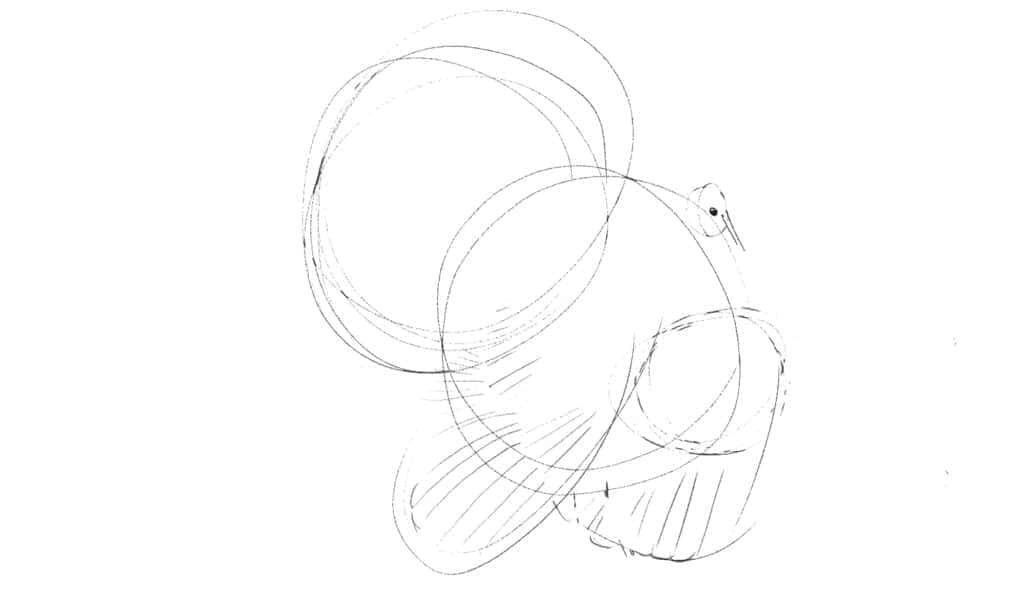
Begin with a few basic shapes. For the body and tail, I used two circles that overlap. Then add space for the head and wings. In full mating display, I think male turkeys look like several overlapping circles. Kind of like when bubbles stick together.
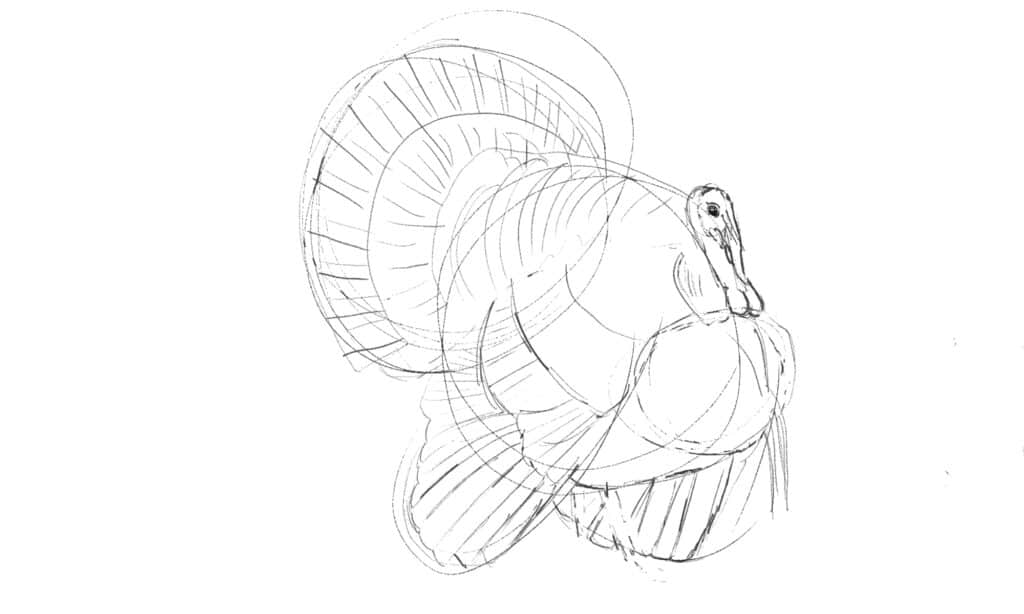
Next, using the basic shapes as your guide, create an outline. Add his snood that hangs down over his beak and his wattles that dangle from his neck. To give you a better idea of how to draw them, find some photos and take a closer look.
- Digital artists: Do this in a new layer. You'll be able to remove the basic shapes easily.
- Paper artists: Sketch right on over the shapes, but do it lightly so you can erase and adjust.
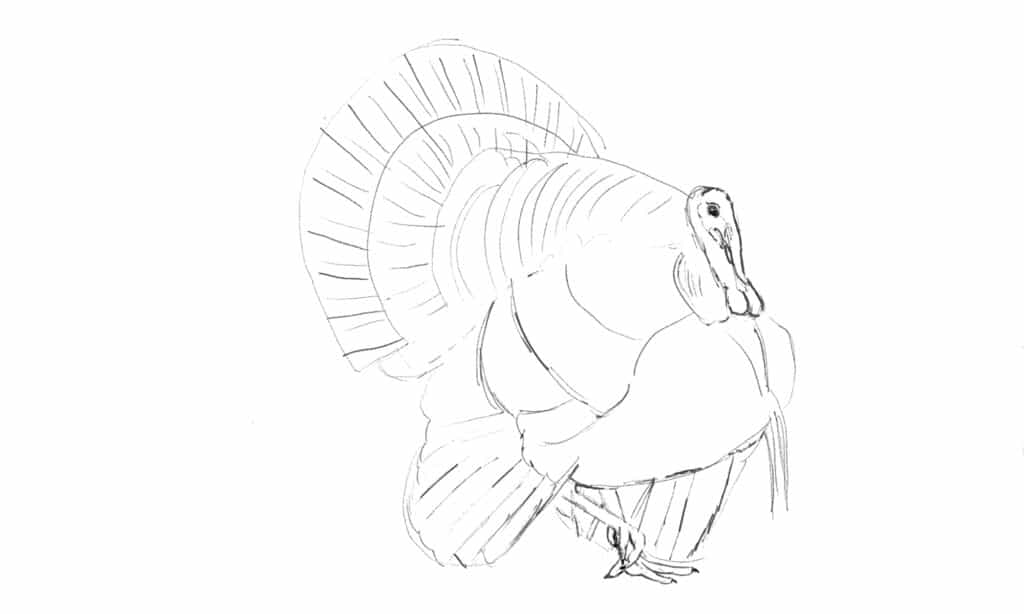
Now it’s time to delete or erase the basic shapes. Then go over your original sketch with your pencil. Now you will have a nice, clean outline to work with. Most of it will still get deleted, erased, or blended into the drawing.
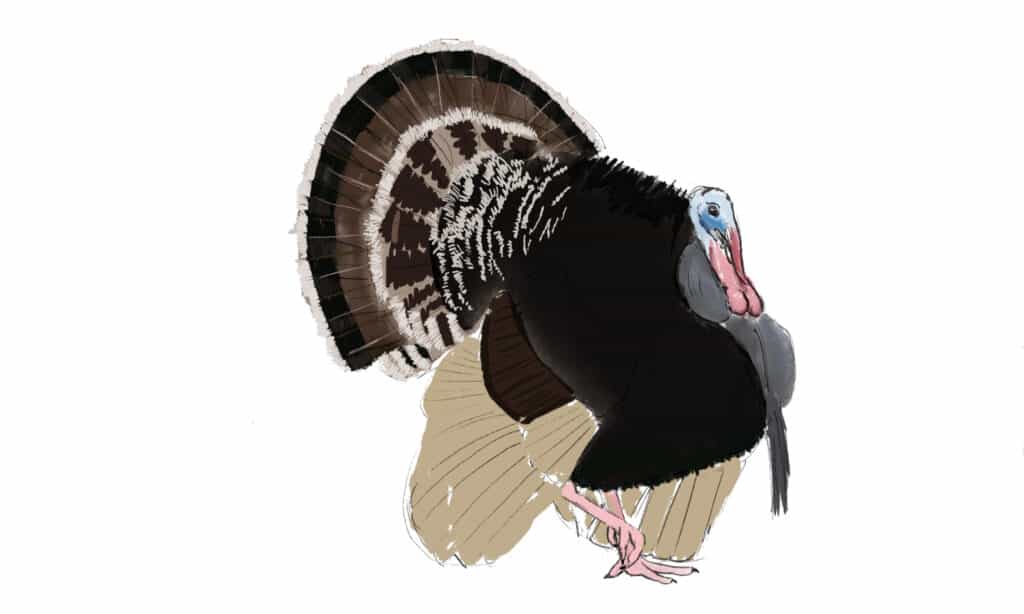
2. Add Base Colors
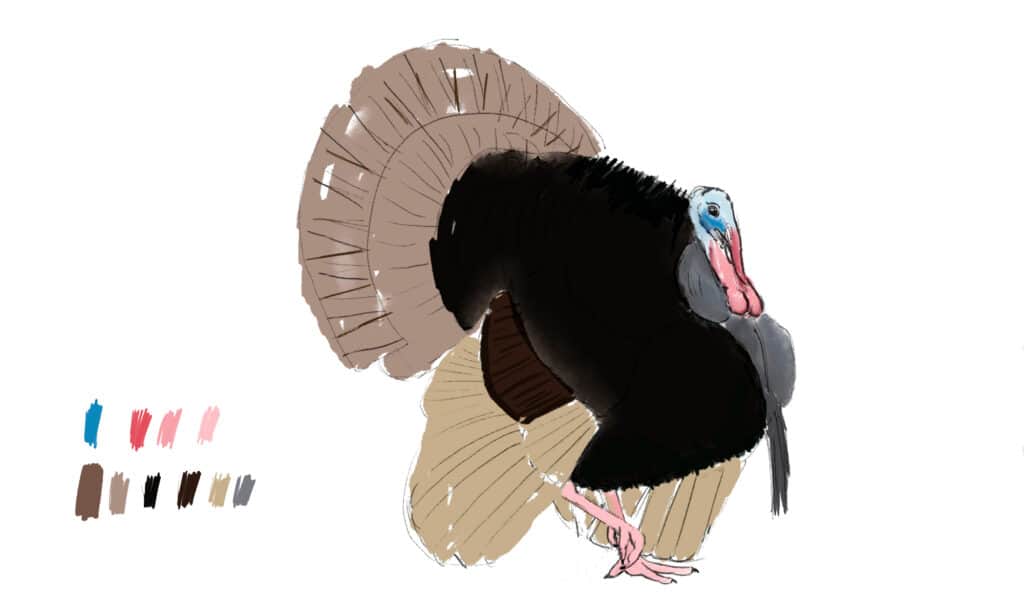
Wild turkeys are beautiful. The females are large elegant dull-colored birds, and the males are magnificent. Similar to other male birds and peafowl, turkey toms have spectacular multi-colored feathers. This is how they attract the females and make babies.
Furthermore, keep in mind as you color that they have brightly colored heads, wattles, and snoods. They also puff out their backs and chests while spreading their wing feathers and tail.
- Digital artists: I created a color palette to the left of the drawing. When I'm working with more than a couple of colors, I do something like this in Photoshop. If I forget to do it, I wind up with colors that aren't quite the same as I originally intended. Do it in a separate layer so you can either hide it or delete it when you're through.
- Paper artists: A few notes: First, leave some space in the black sections near the tail. You'll need it in a minute. Second, consider taking a moment to create a color palette for yourself on a separate piece of paper. For each color, create a light, medium, and dark gradient. This way, you'll better understand how each color will behave in different densities. Third, I did not use watercolor pencils in my paper drawing. I feel like some of the sharp details get lost in watercolor.
3. Add Detail
Now we start getting to the fun part and making our turkey look like a turkey and not just a blob. I’m right-handed, so I started with the tail because it’s on the left side. This way I don’t smudge my work. However, if you are left-handed, then you may want to start on the other side. Before adding the crazy color patterns, I color in the solid blocks. Turkeys have creamy-white fringe on their tail and some of the surrounding feathers. If you begin here, the other details are easier.
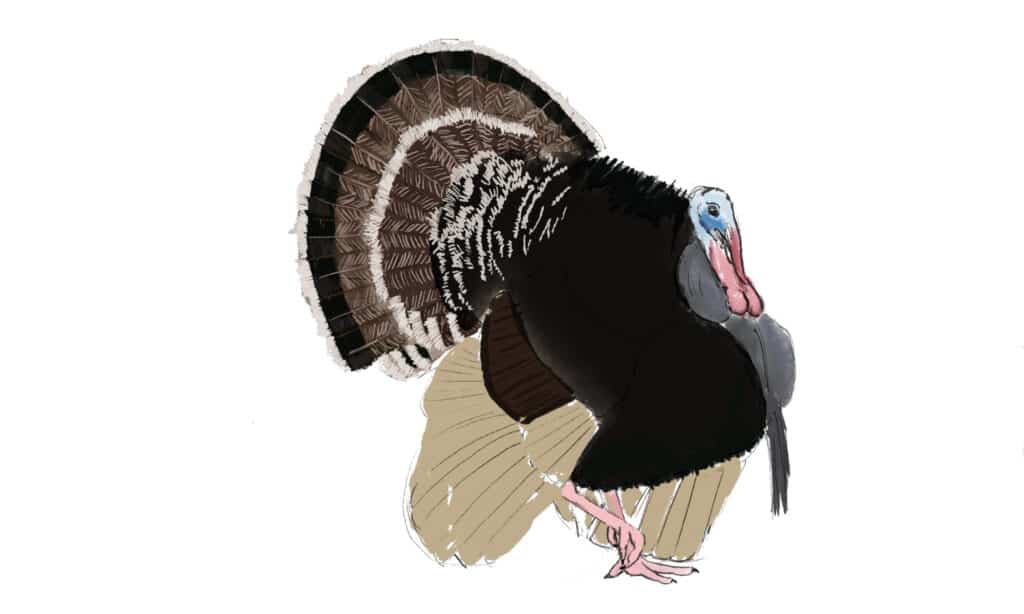
Take your time adding detail. Next, fill in the patterns on the feathers. They kind of go at angles from the center of each feather. If you look at the feathers on the turkey’s back, they are also puffed up and stick out. We don’t want them to lie flat. Erase your outline in that area and create a ragged edge to the black.
Next, we are going to add black edging to the wings. Leave some open spaces in the color. The most difficult part is getting the wing feather patterns right, so take your time in this step. To do this color along the front edge of each feather, then push your stylus or pencil towards the trailing edge of each feather. It should mostly have a dark brown/solid black leading edge and a broken trailing edge of brown with black and dark brown streaks.
- Digital artists: This is one area where I used several layers. I grouped them according to tail and wings.
- Paper artists: You may want to experiment with the wing and feather details on a separate piece of paper. While it's not the end of the world if you have to start over, it is frustrating.
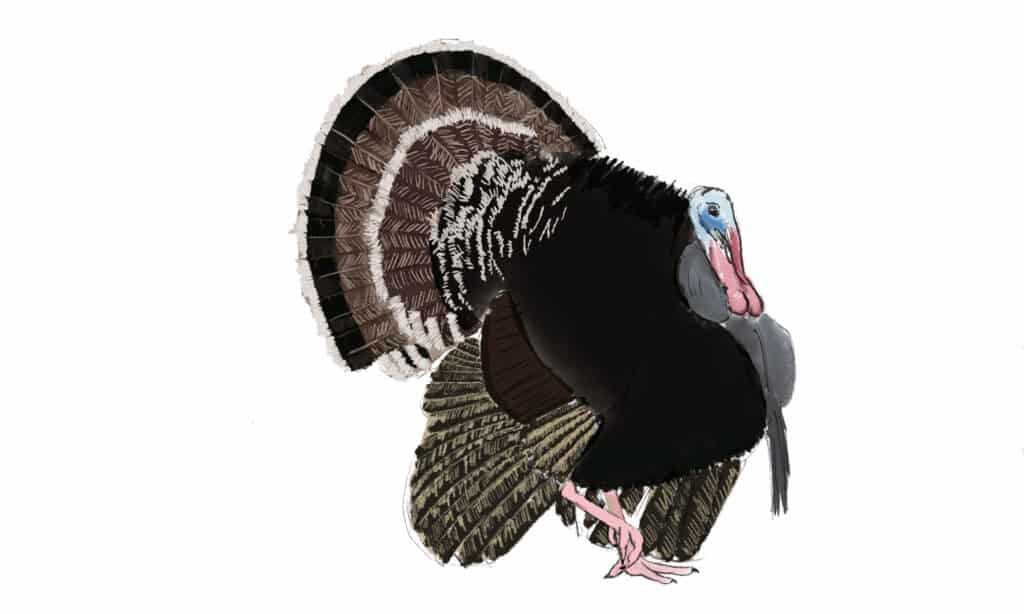
4. Add Shape

When it comes to adding shape and detail to black feathers and fur, it’s more difficult than when using light colors. This is because black doesn't reflect light unless it's shiny, and then only if the light is strong enough. Another reason is that we tend to start with lighter colors and add darkness for shadows; black is a shadow.
All of the turkey’s black body feathers fluff out too. In our drawing, the light is coming from the upper right side, hitting those puffed-out black feathers right on the edges.
The final result should show the feather edges sticking out quite a bit and then fading away into the body.
- Digital artists: Create a new layer and add medium gray feather edges in a roughly circular pattern. Blend the edges into the black, giving the impression of edges in the light and the rest in shadow.
- Paper artists: Use a white pencil and create the feather edges. Create a clean outer edge and blend the inside edge into the body.
Now it’s time to add more shading. Keep in mind the light is coming from the upper right side. Wherever one feather is blocking light from hitting another feather, that’s where your shadows will be. Add some shading around the tail, feet, and short feathers. Next, his wattles, head, snood, and right breast also need shading. Take your time with the shading and do little bits at a time.
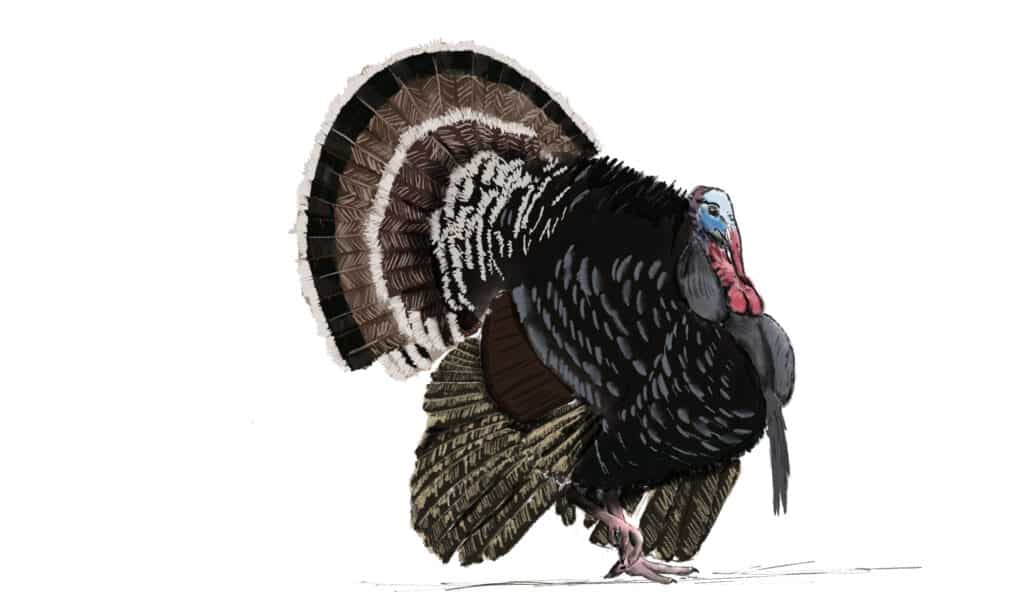
5. Highlight Your Turkey
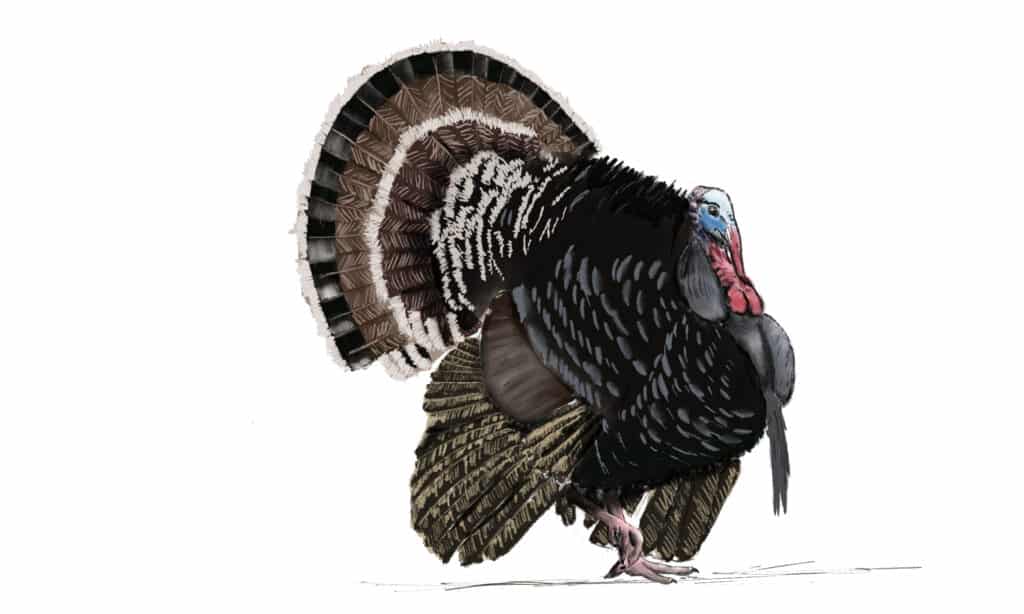
We are finally getting there; let’s add some highlights next. Our turkey is facing the sun above and to the right. Anything exposed to the sun, like the top of his head, feet, and the outer dark park of his tail, will need a small amount of highlighting. Add white to those areas and soften the edges.
- Digital artists: Create a new layer and use white. Draw it in the areas that need highlights, then use a blending brush to take care of the edges.
- Paper artists: Depending on your personal preference, you can use a moldable eraser to pull away the white pencil or colored pencil.
6. Final Notes
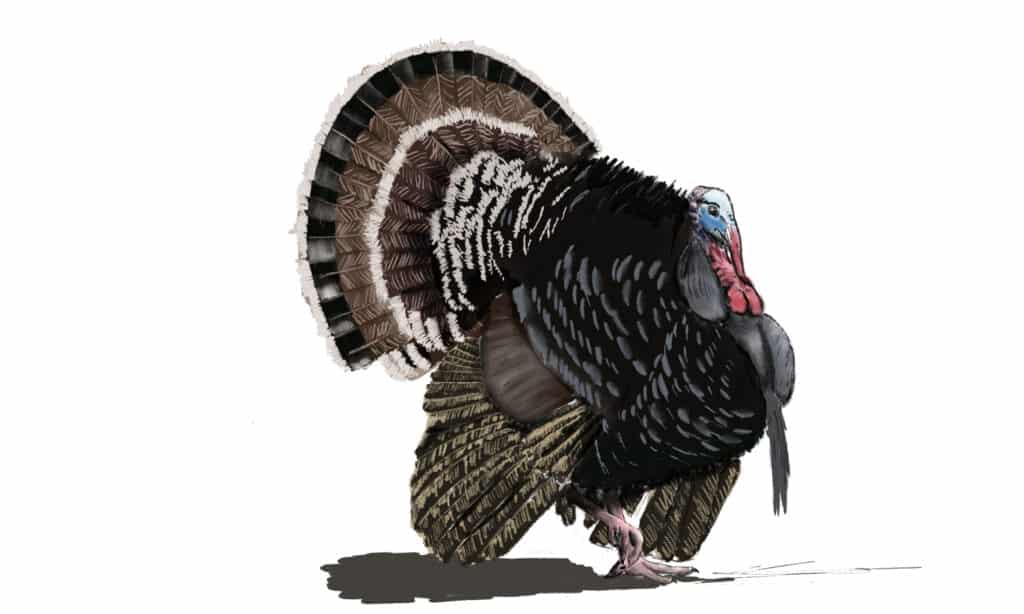
Your 6 easy steps to draw a turkey are finally complete. As always, put it aside for a few days and then take another look and see if you’re happy with it or if it needs a few more final touches. If you enjoyed this, you may want to try drawing a wolf next.